Creating a Google OAuth client
Some Google apps listed in Adenin's App Directory require you to create a custom app registration first. These apps are:
- Google Fit
- Google Mail
- Google Drive
In this tutorial we'll walk you through obtaining the OAuth registration.
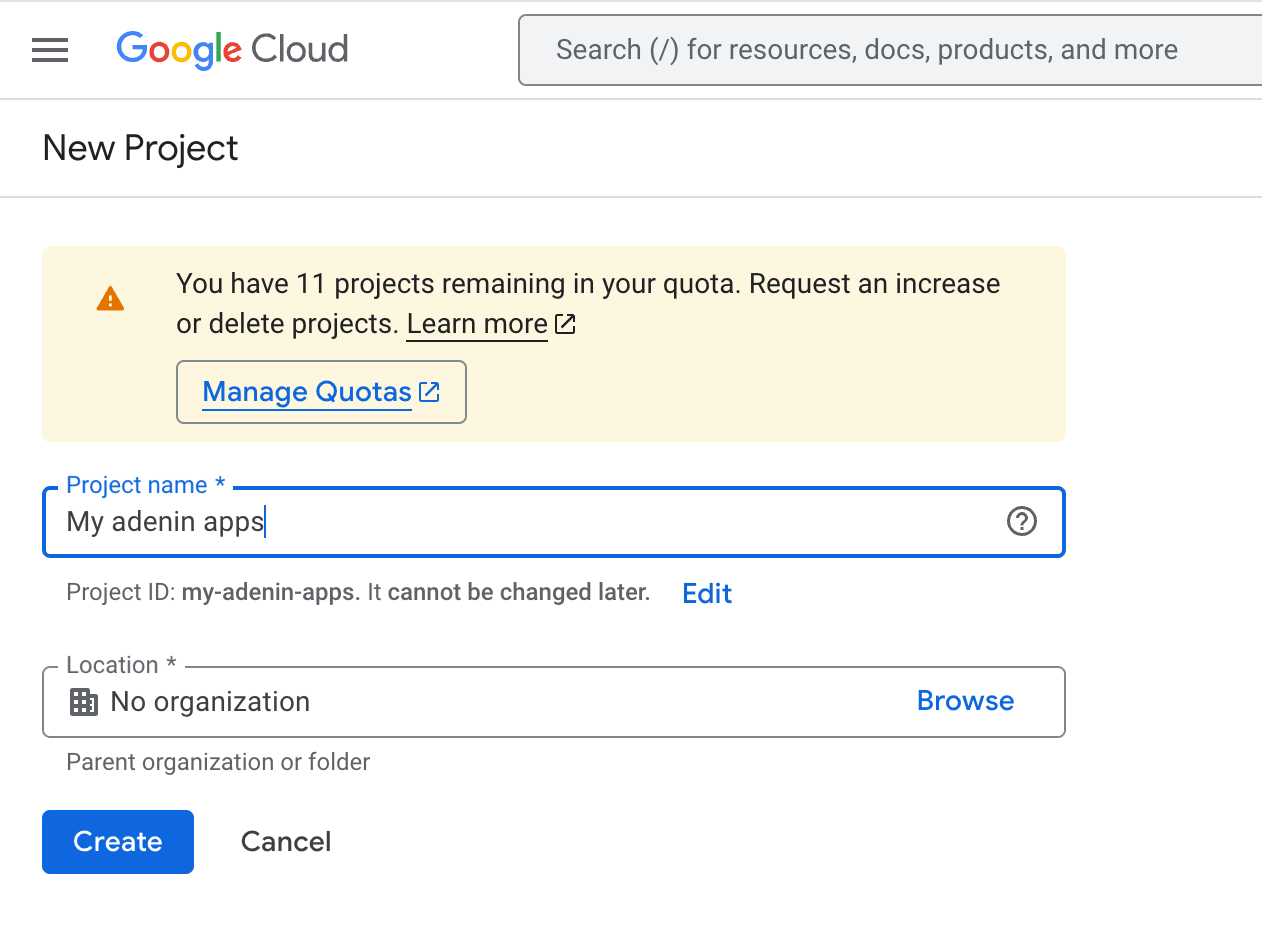
Go to your Google Cloud Console, and add a new project.

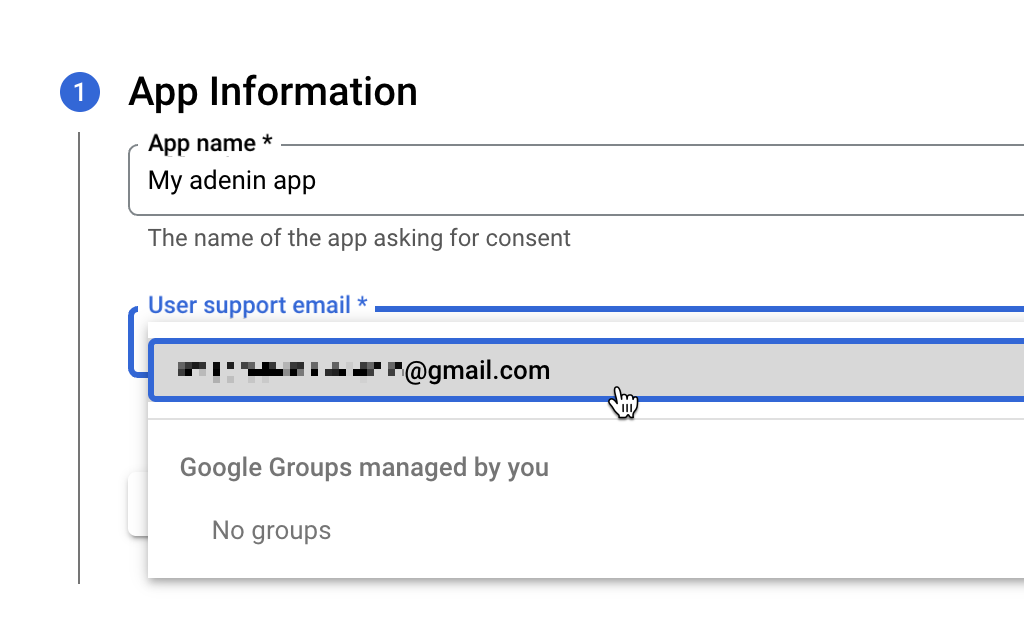
Name the project My adenin apps
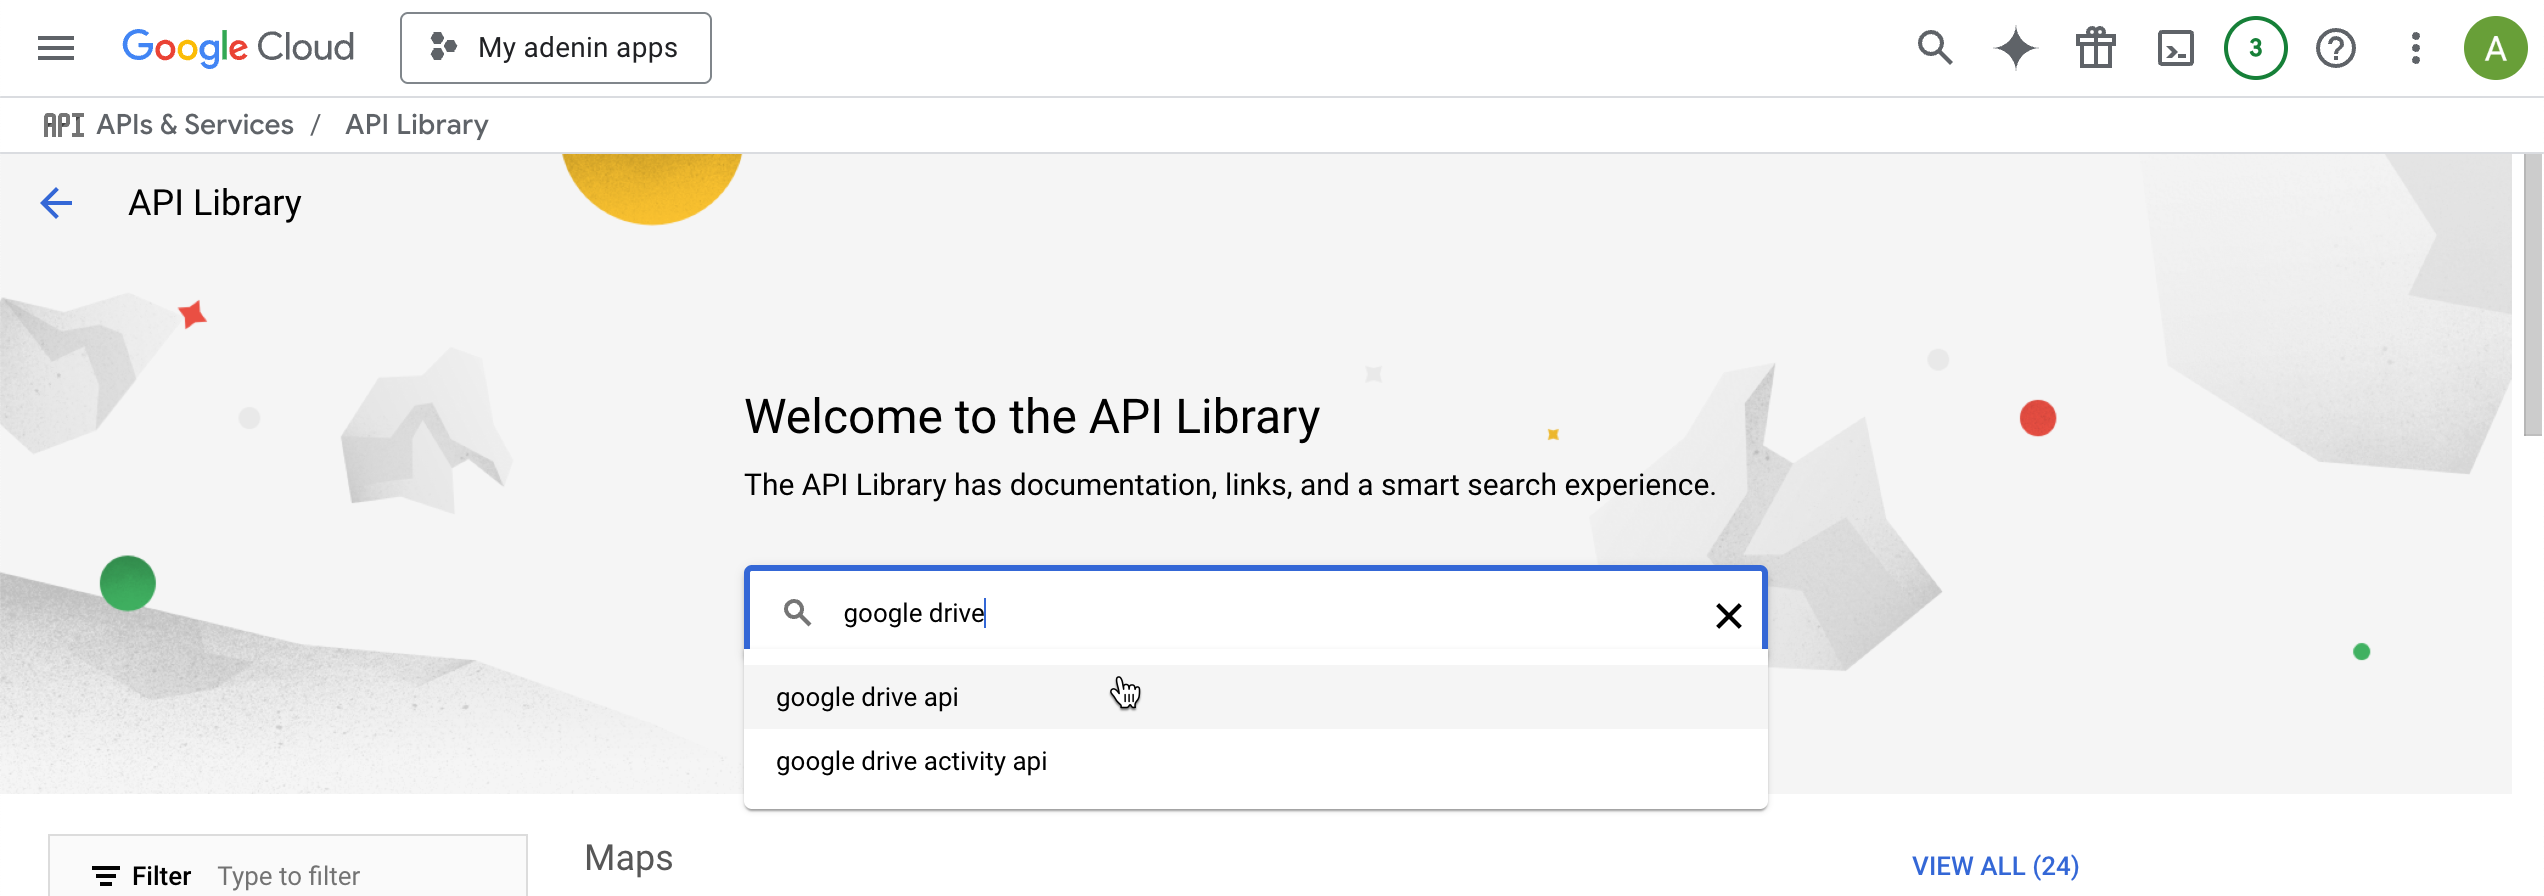
Then select your project and navigate to Library

Type in Google Drive or whatever app you wish to add first.
Either use a different app or repeat this and the next step for the other apps you wish to add. You can add multiple apps into the same project.
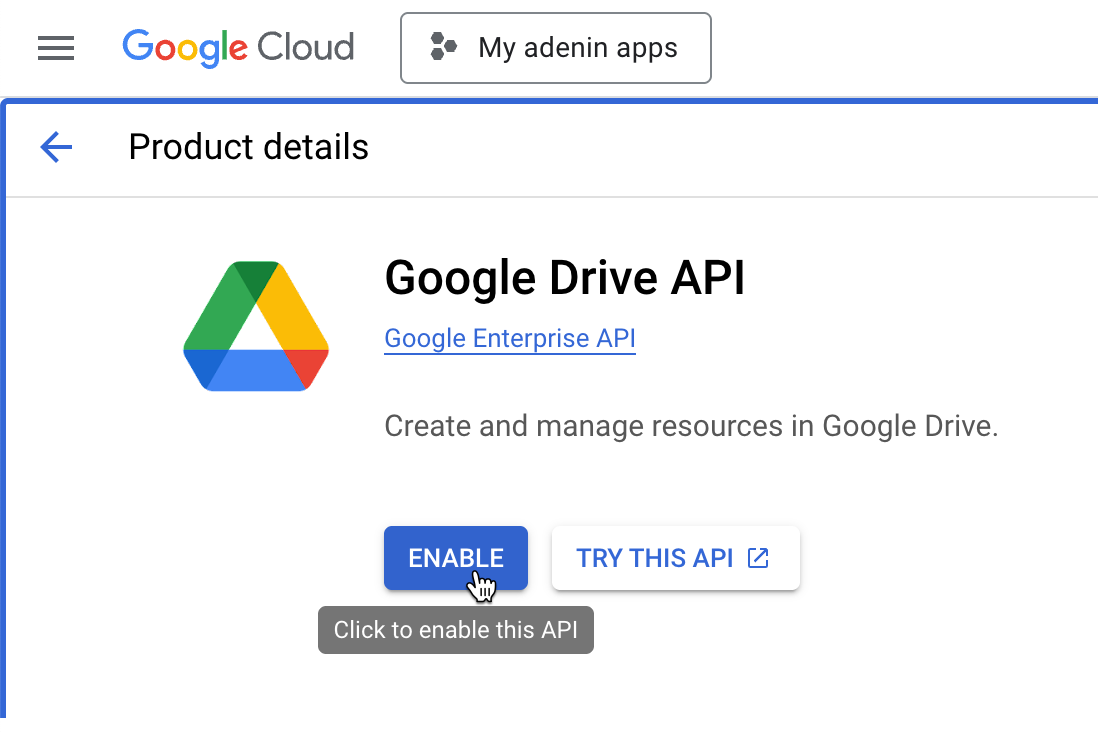
Enable the API
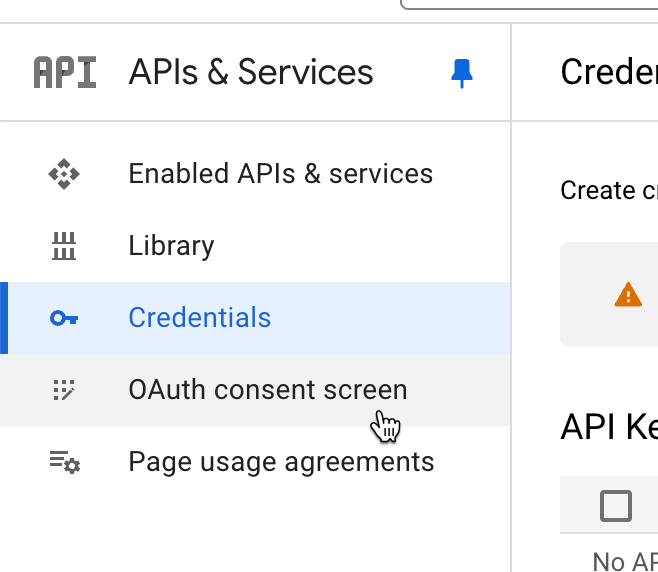
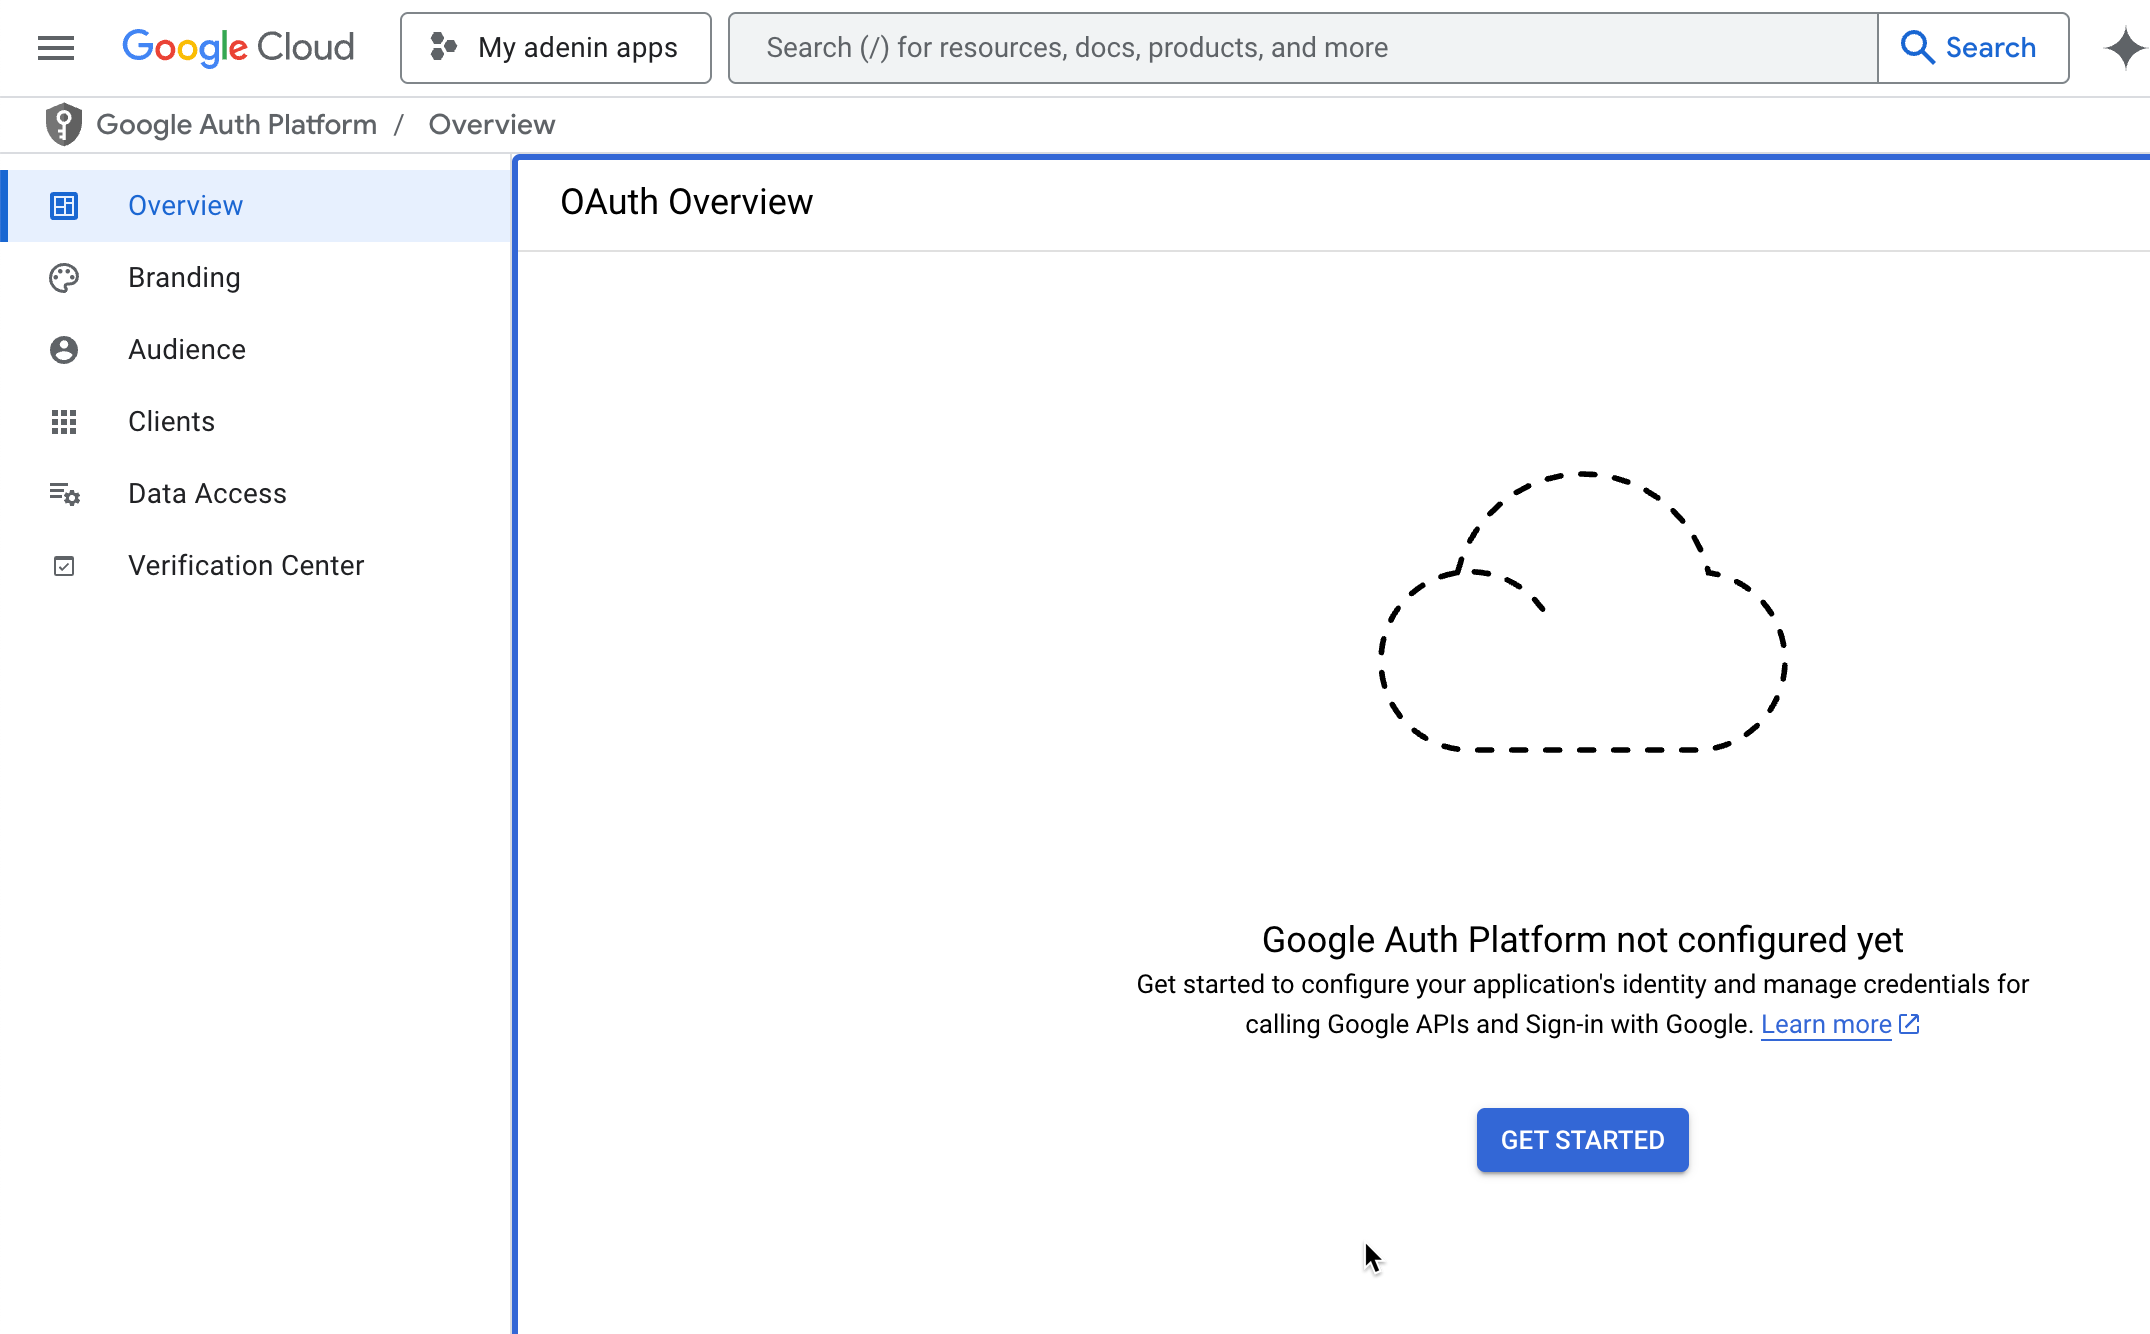
Once you enabled the app(s) you need, navigate to OAuth consent screen
Click on Get started
Select your email address from the dropdown
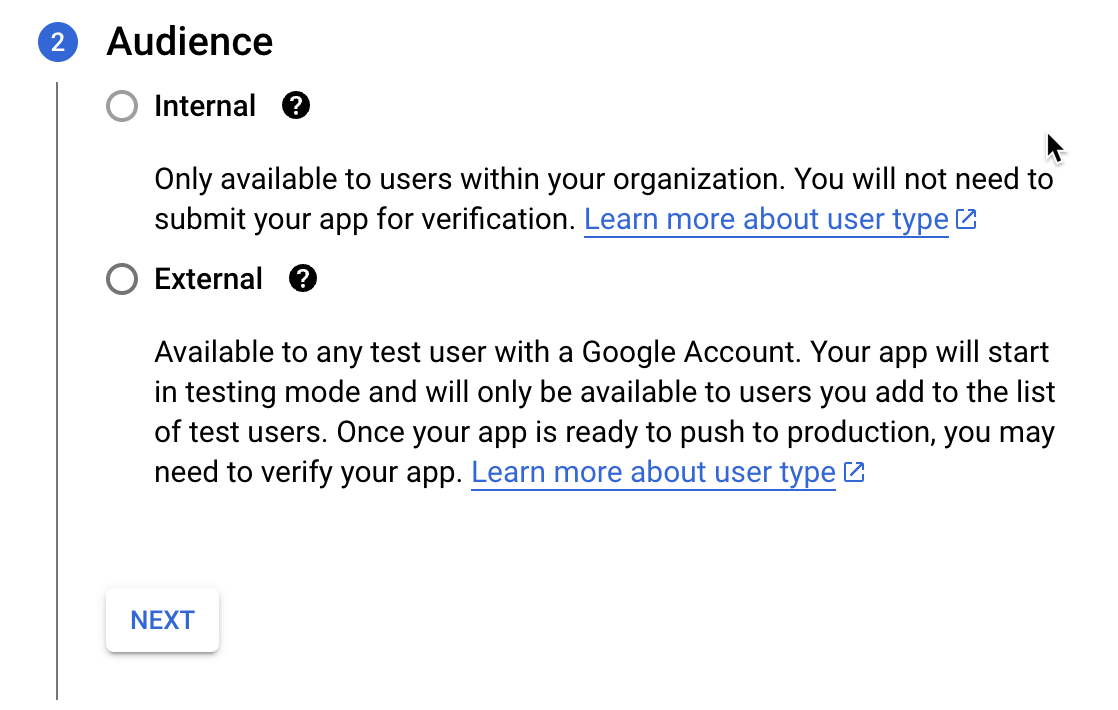
Select your audience as Internal if you use Google Workspace, or External in any other case. External will impose a limit of 100 connections. We're continuing this tutorial as External which means steps will be slightly different for Internal.
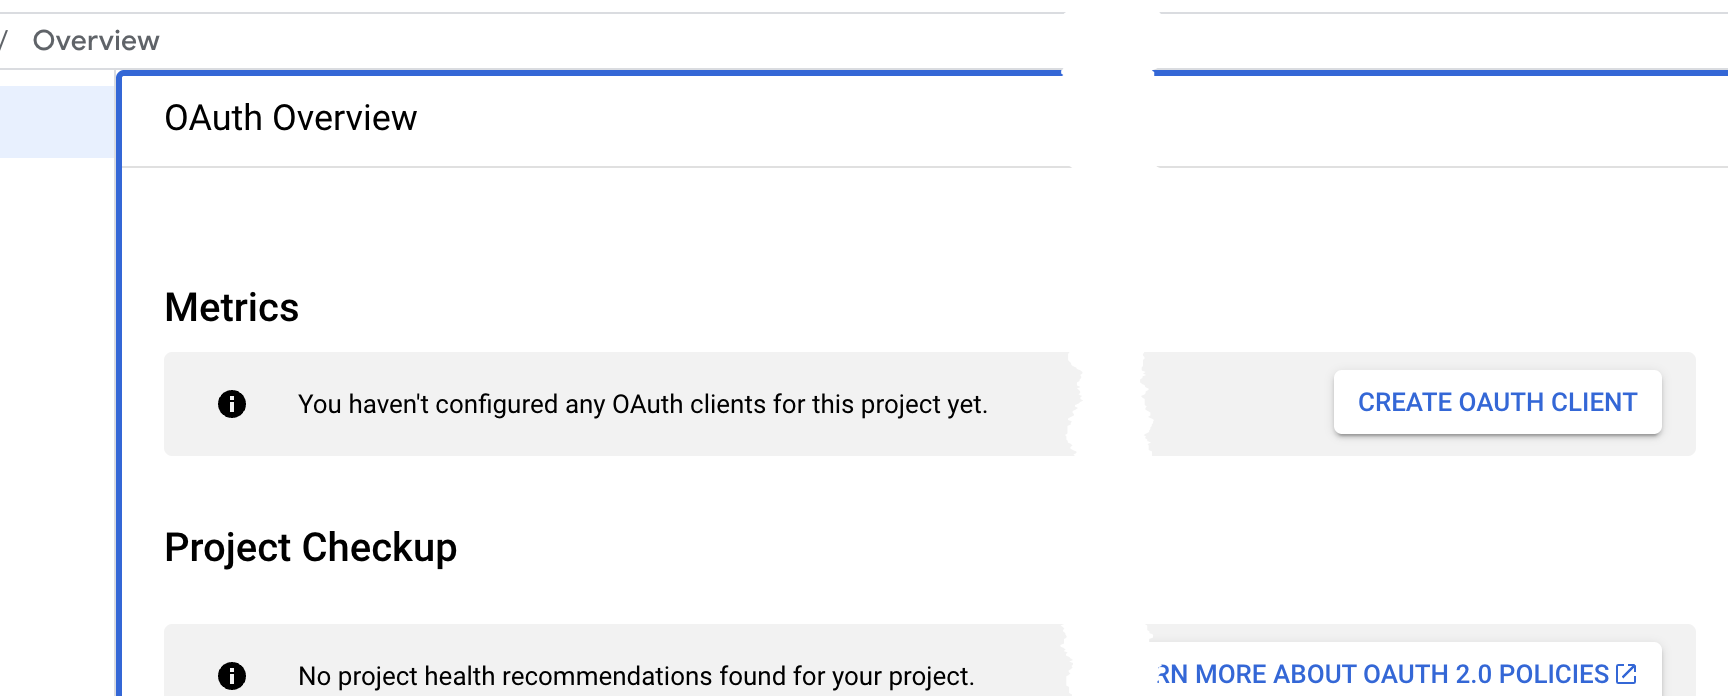
Once finished, on the next page click on Create OAuth client
Select Web application, enter the name as
My adenin appand then enter as your Authorized JavaScript originhttps://app.adenin.comand as your redirect URIhttps://app.adenin.com/oauth2connector/returnUrl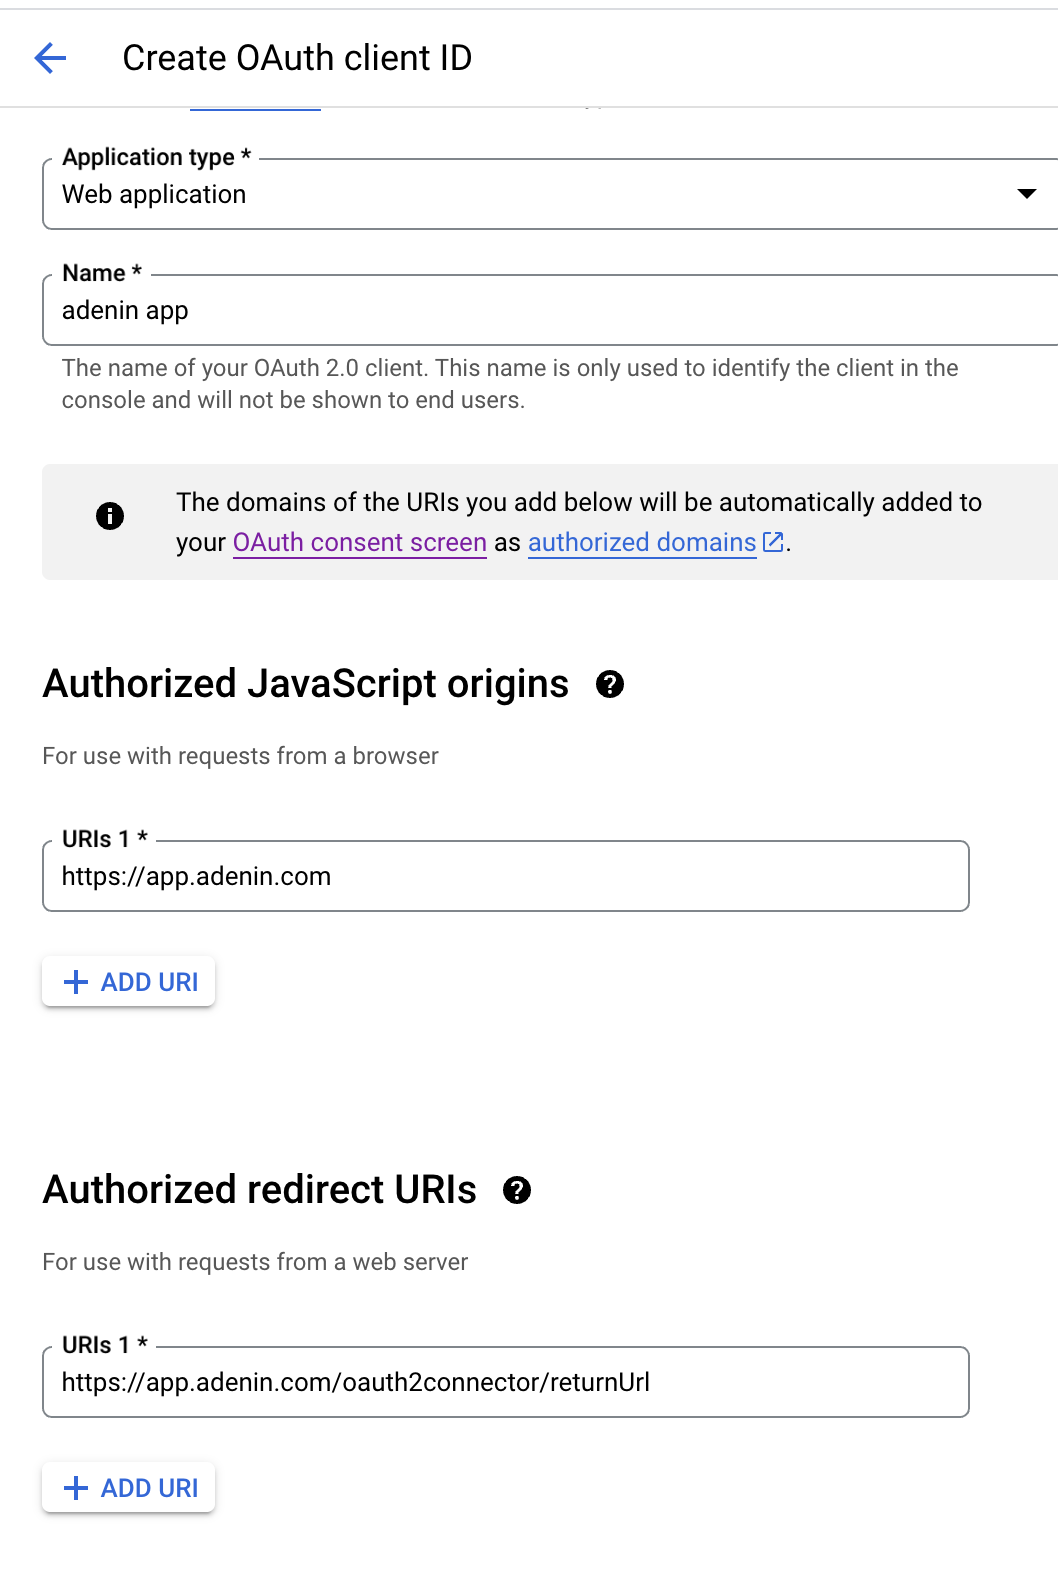
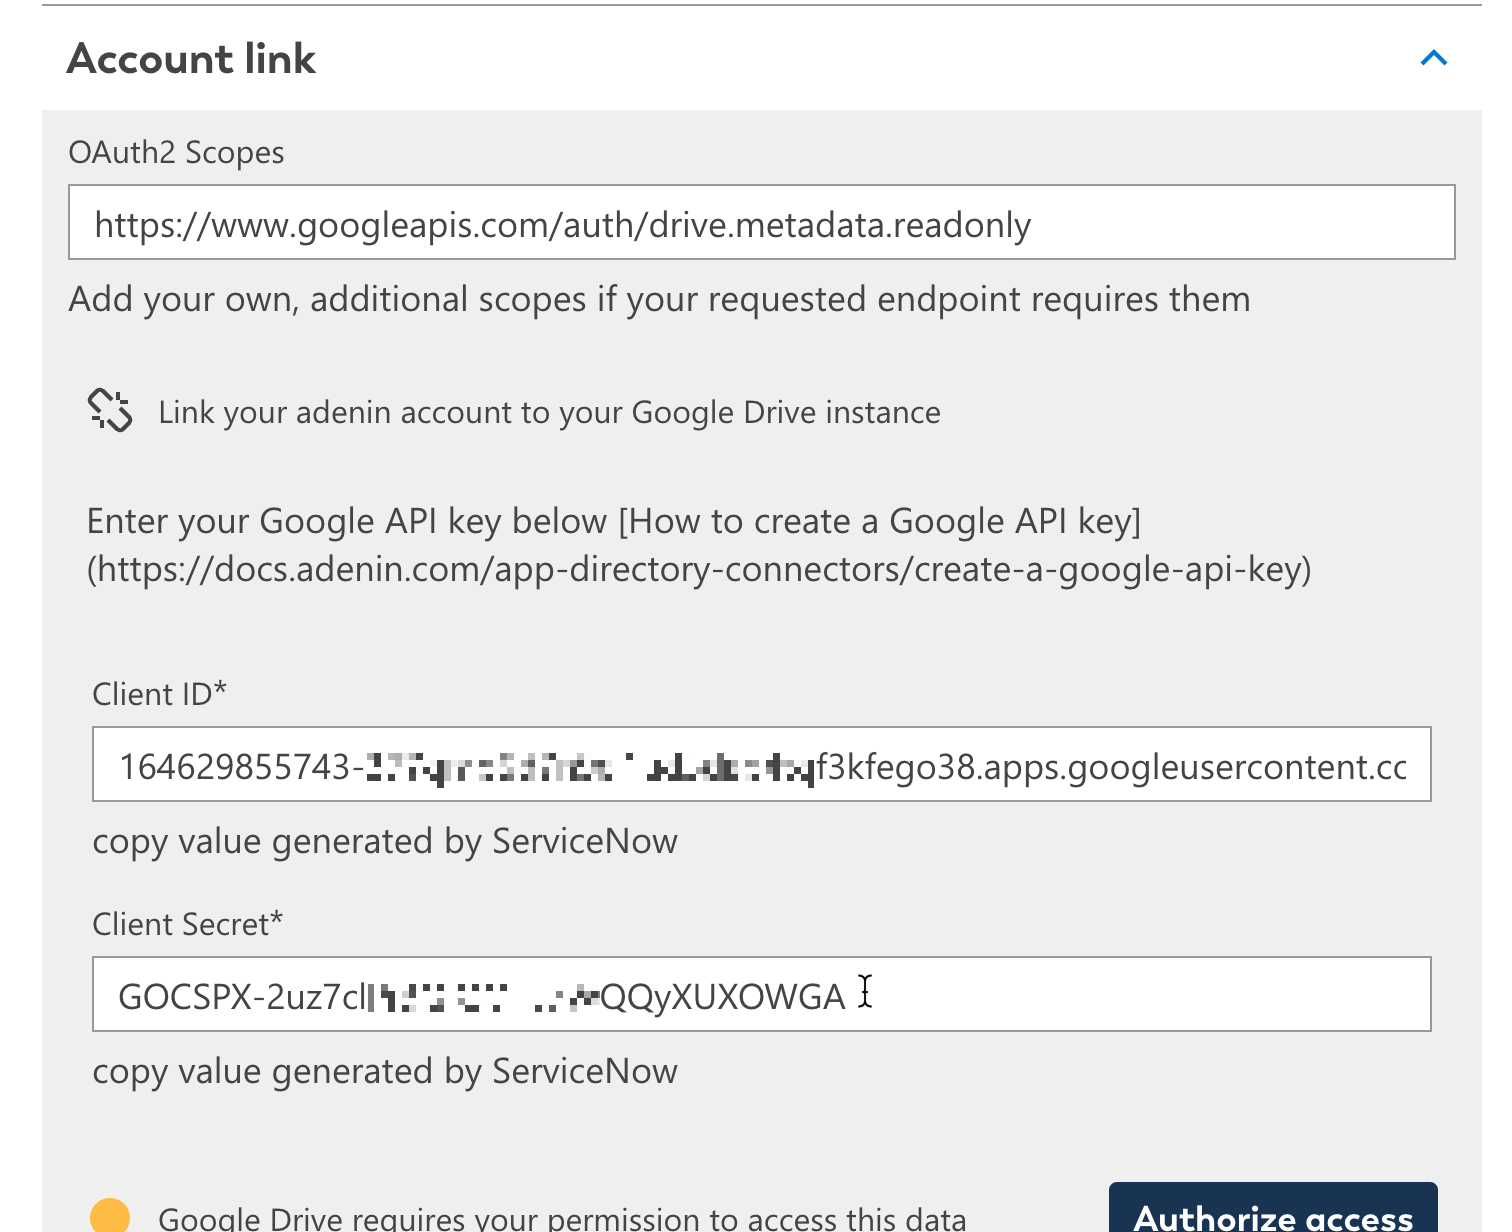
After you save this, you will receive your Client Id and Client secret

Copy these values across to your adenin connector configuration section
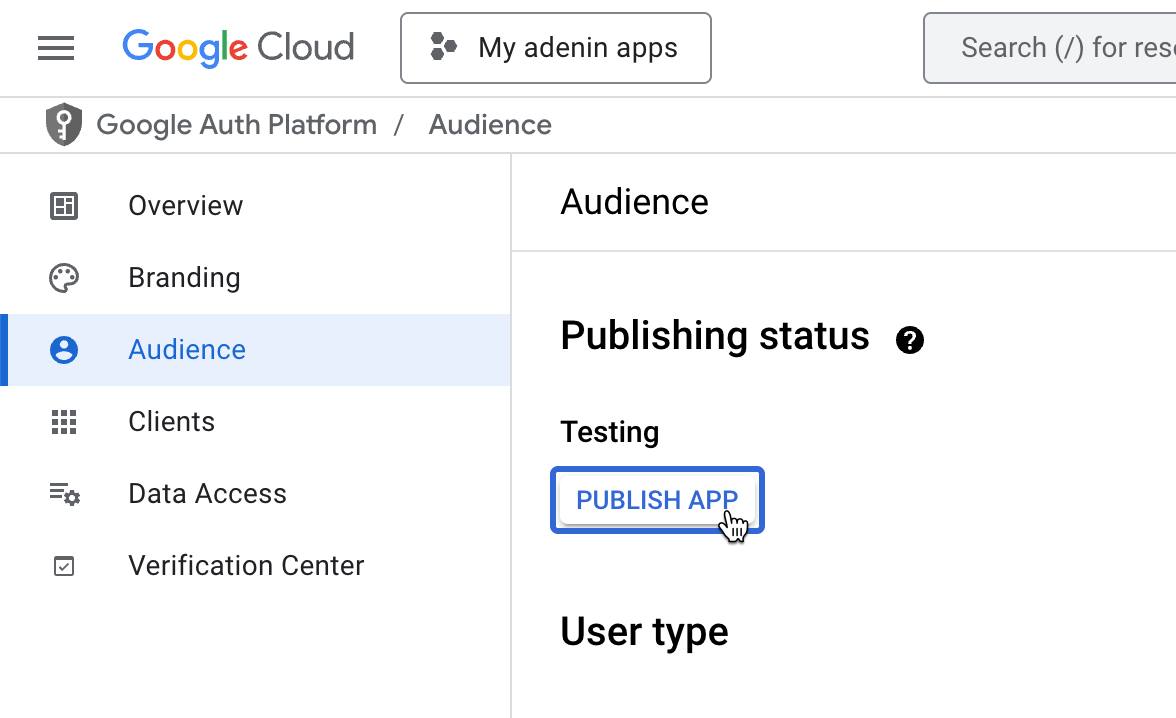
Then go to Audience and click Publish app
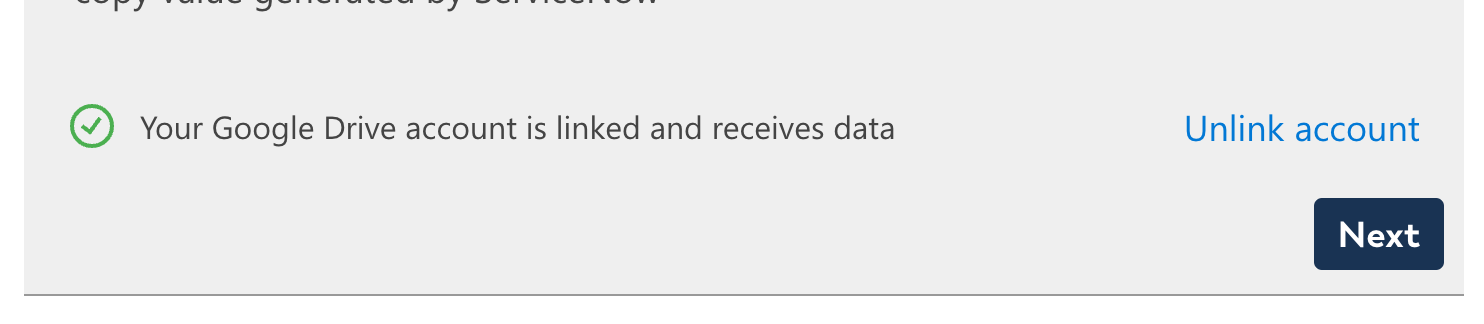
Once this is complete, click on Authorize access in your adenin connector configurations

You will receive a warning from Google that the app isn't verified which can be ignored as you're not planning to ship this project to the general public. Click on Go to adenin.com (unsafe)

Finally your app will show as being connected successfully
I am getting error 403
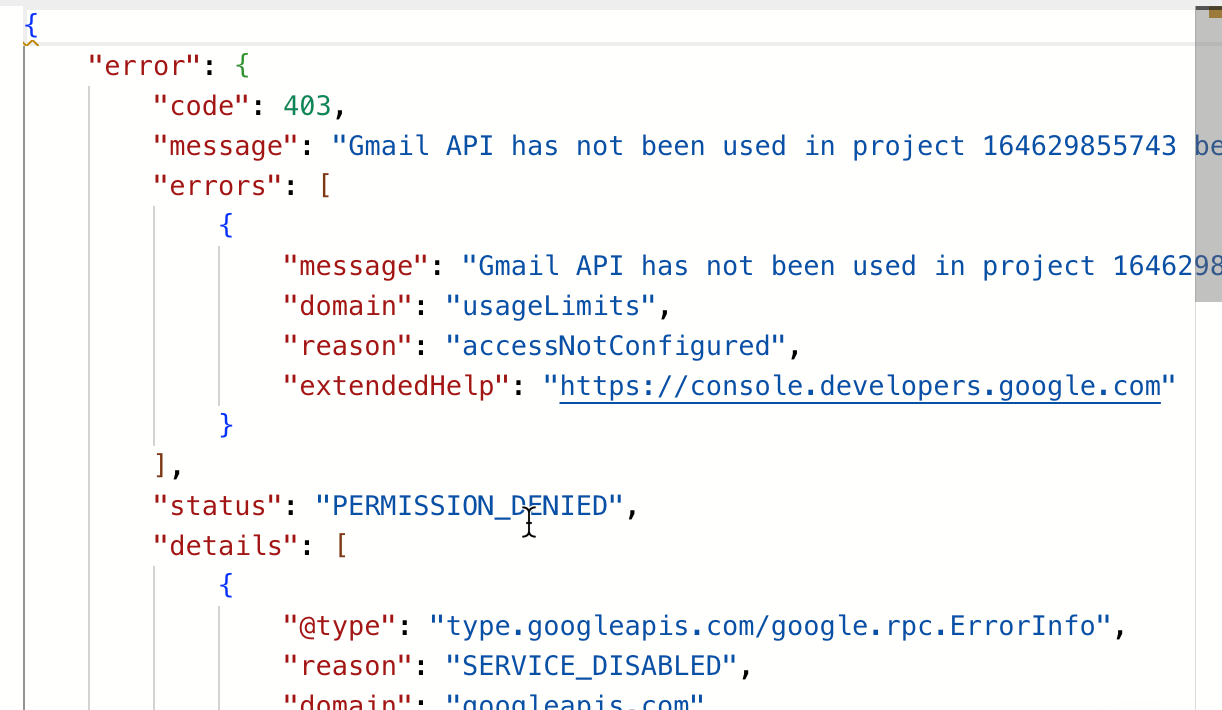
If you receive this error straight after connecting to your Google app, then repeat steps 3-5 above for the app in question. If that doesn't solve it, please contact support with a screenshot of your error message.