Use SCIM for identity management with Adenin
In this article we'll guide you through how to set up SCIM with Azure Active Directory (also known as Microsoft Entra). Some connectors will require this setup and this will be pointed out in the respective docs articles for your connector. Setting this up may also be a more secure implementation which your organization may require for their use with Adenin's Enterprise plans.
The goal is that users can be added, deleted and modified using SCIM 2.0. You can then define groups within your Azure Directory and Adenin will sync those users.
1. Go to Microsoft Entra
First navigate to https://entra.microsoft.com/ and then select Applications → Enterprise Applications
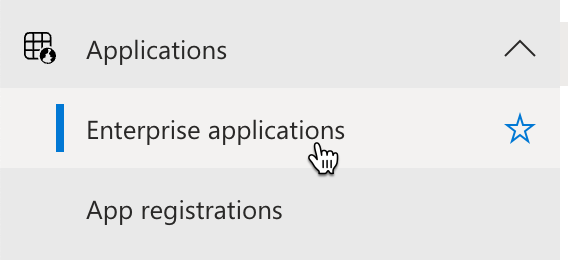
Then select New application
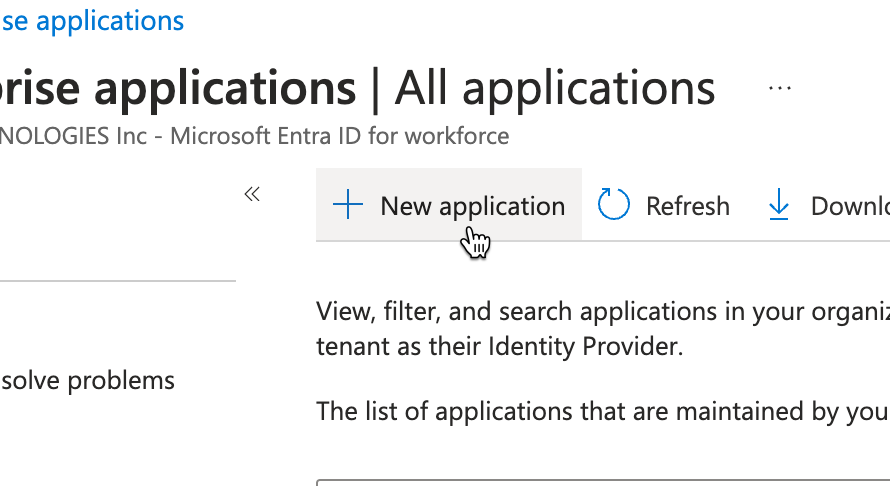
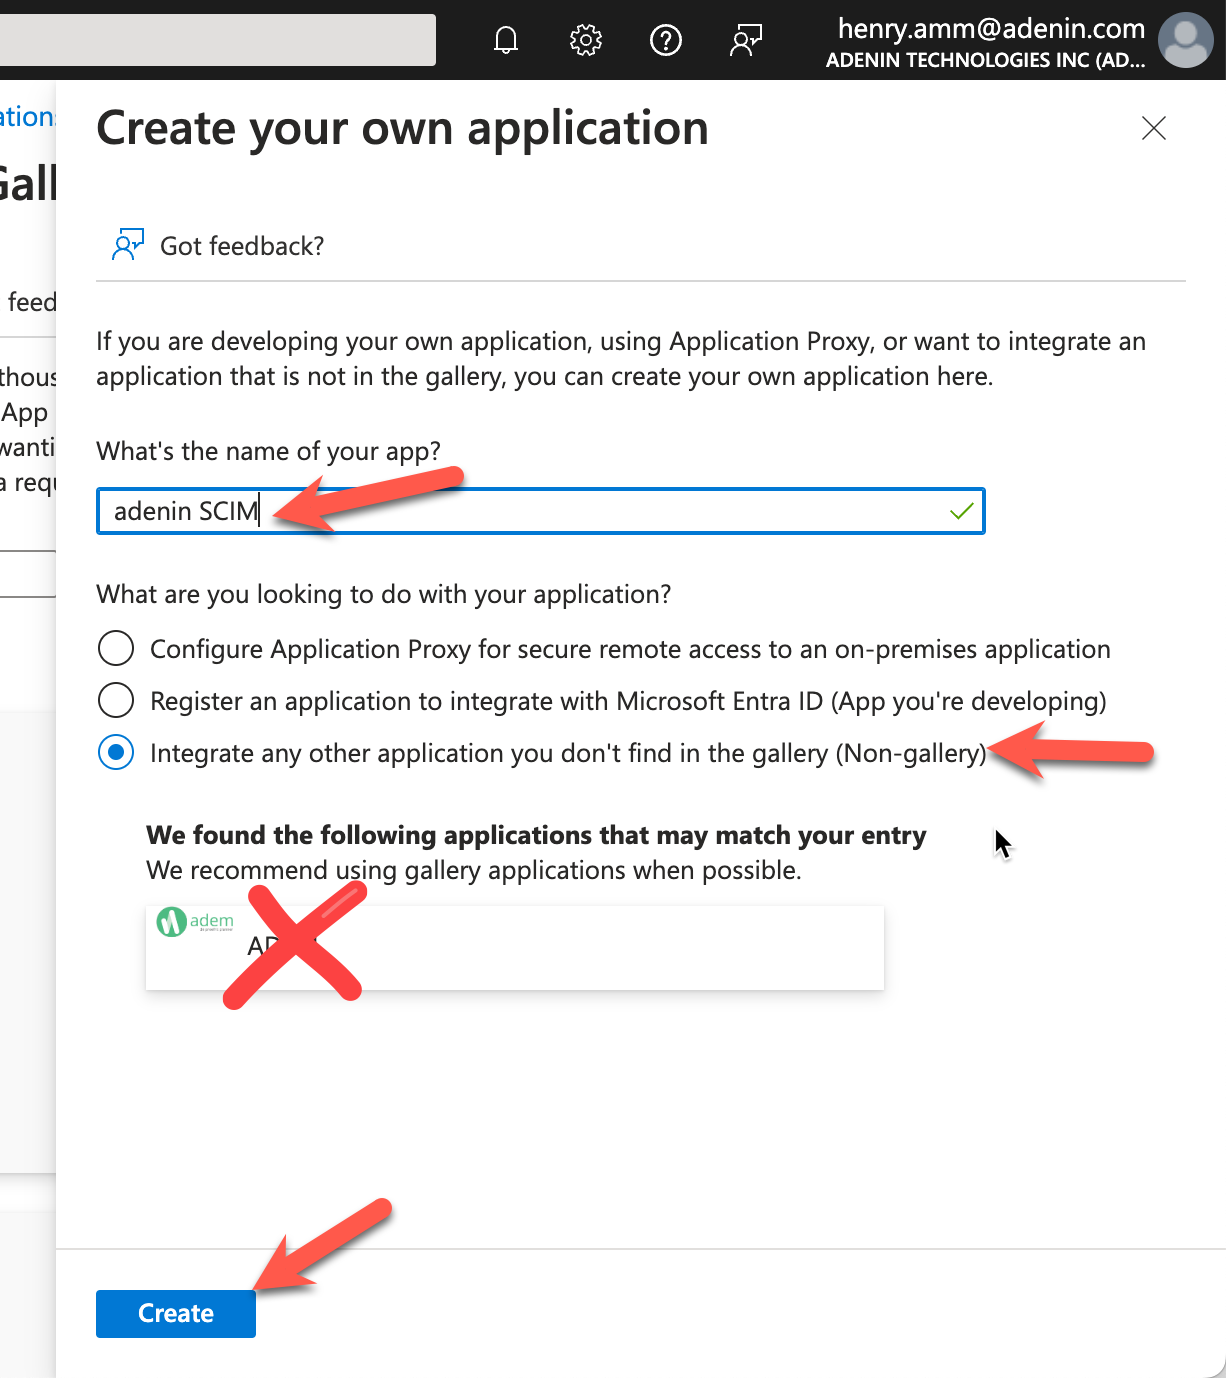
2. Create your Adenin application
Then click on Create your own application
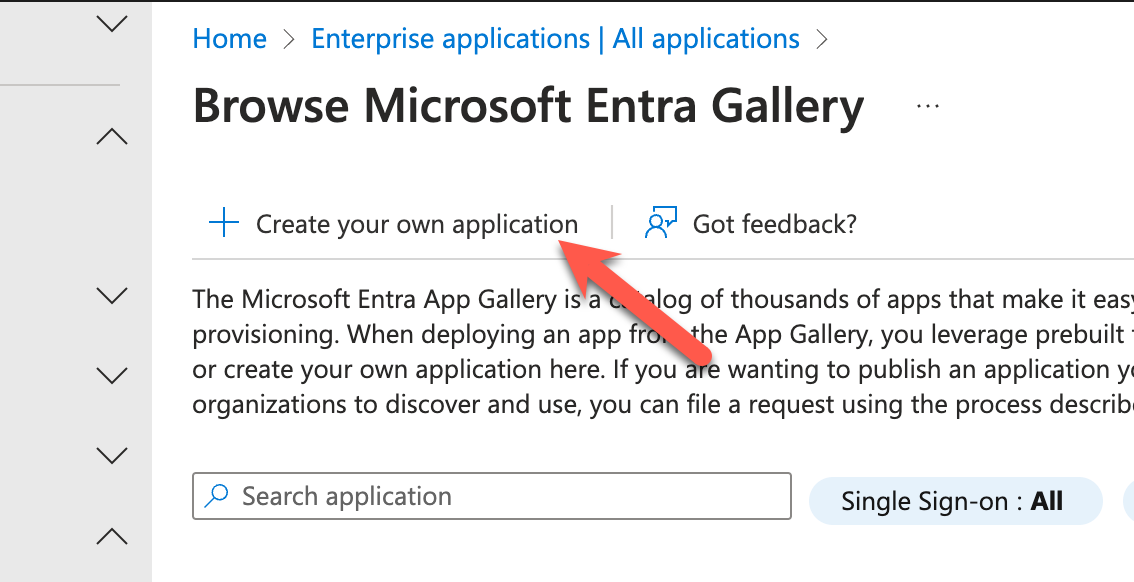
On the next screen we're going to name the application adenin SCIM and select Integrate any other application you don't find in the gallery (Non-gallery). If this screen suggests any applications, ignore those. Then select Create to continue.
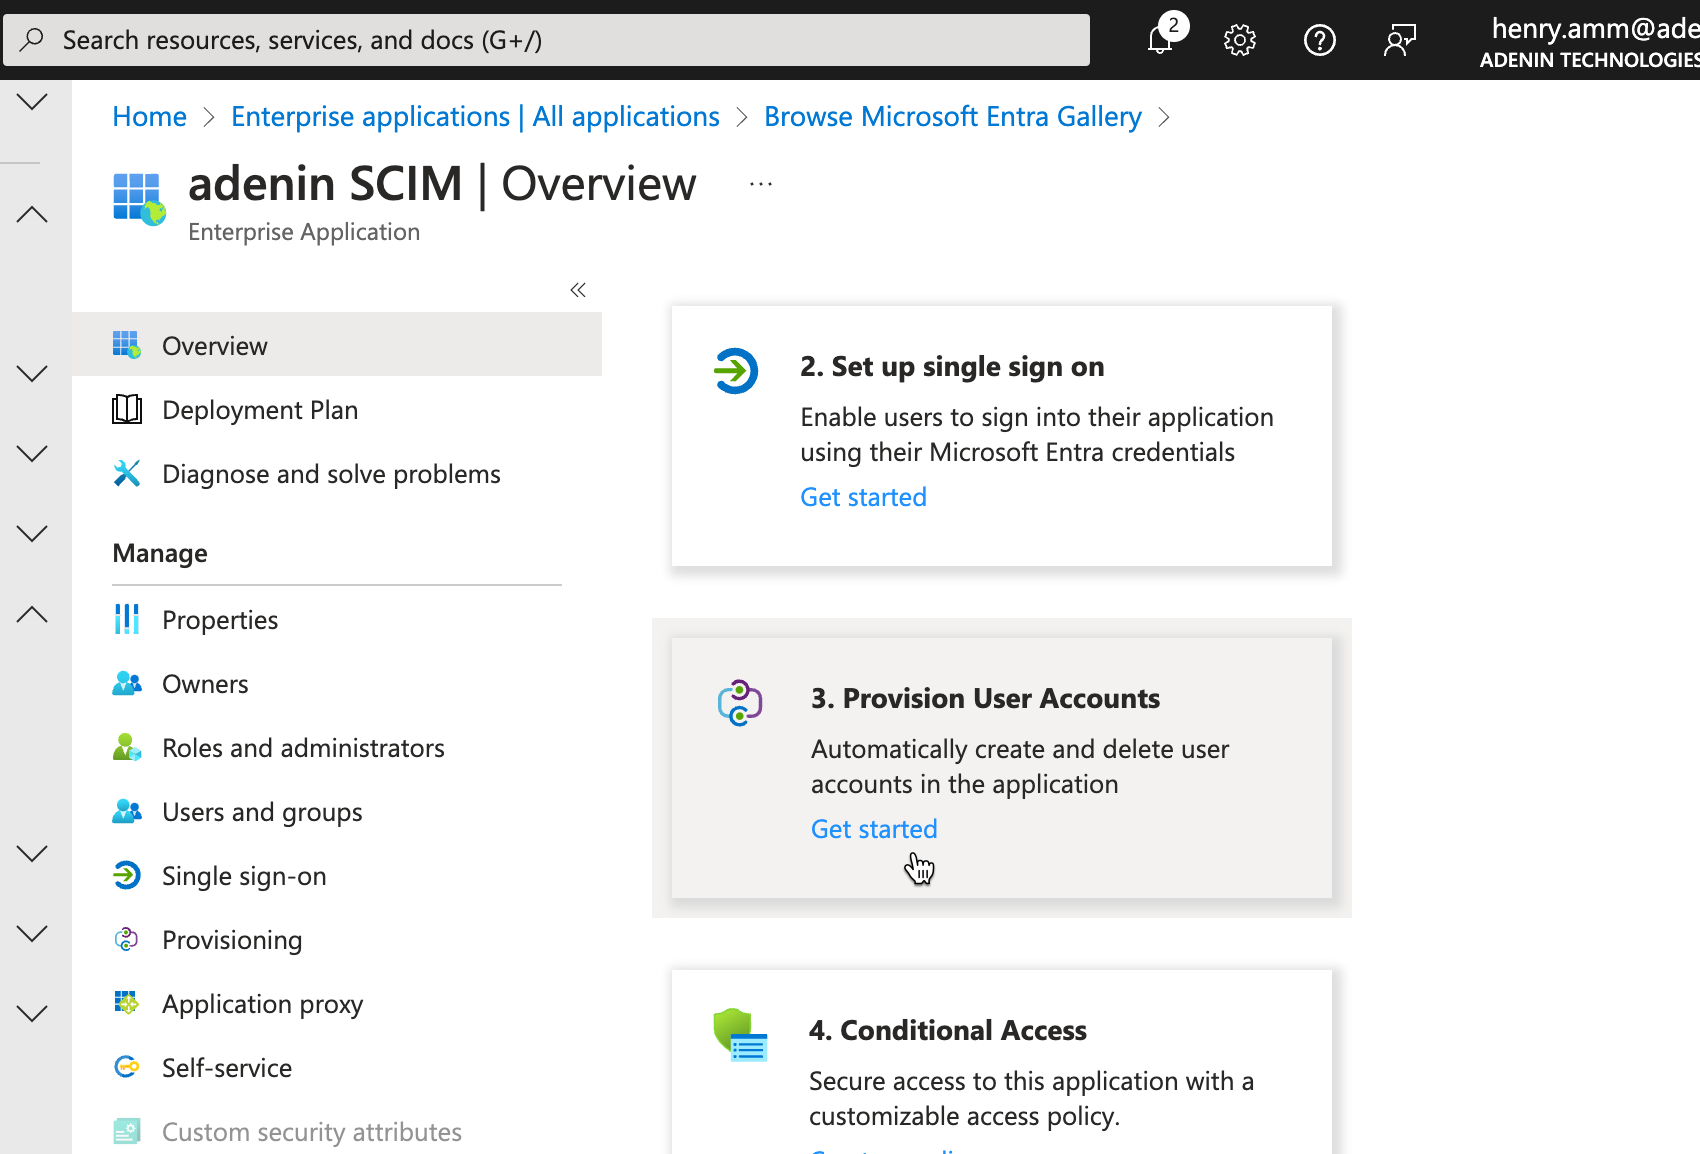
This will take a few moments and at the end you'll see the overview page for your new application. Once there, click on 3. Provision User Accounts.
Then click on Continue

3. Set up sync to Adenin's platform
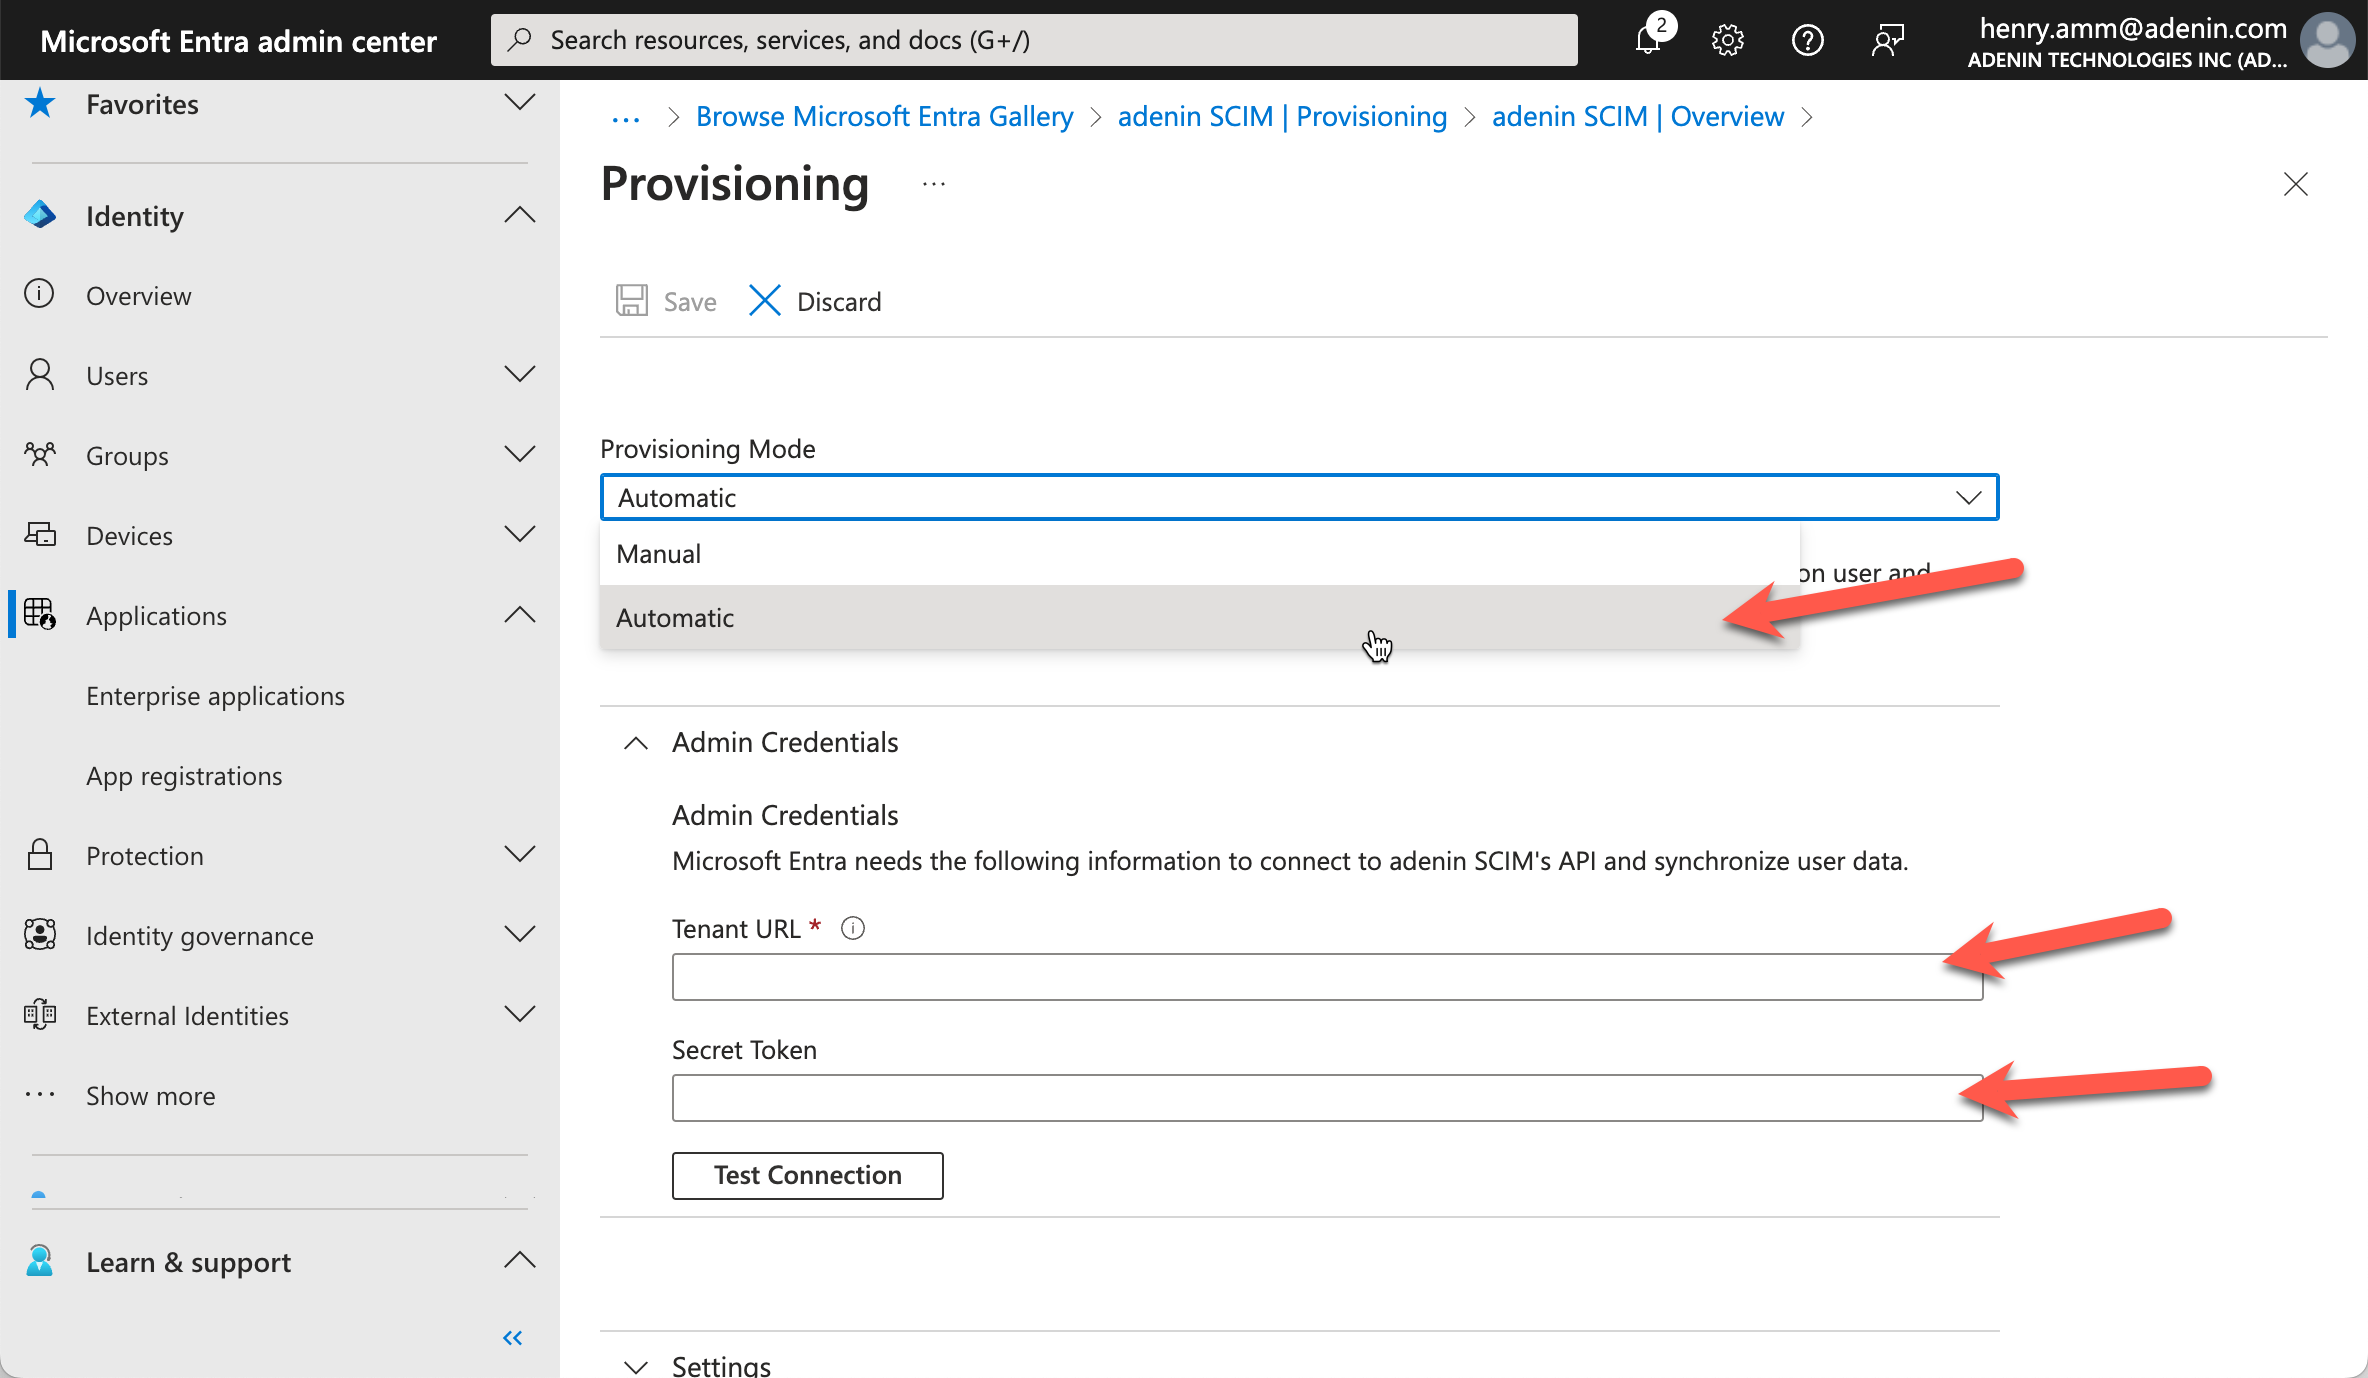
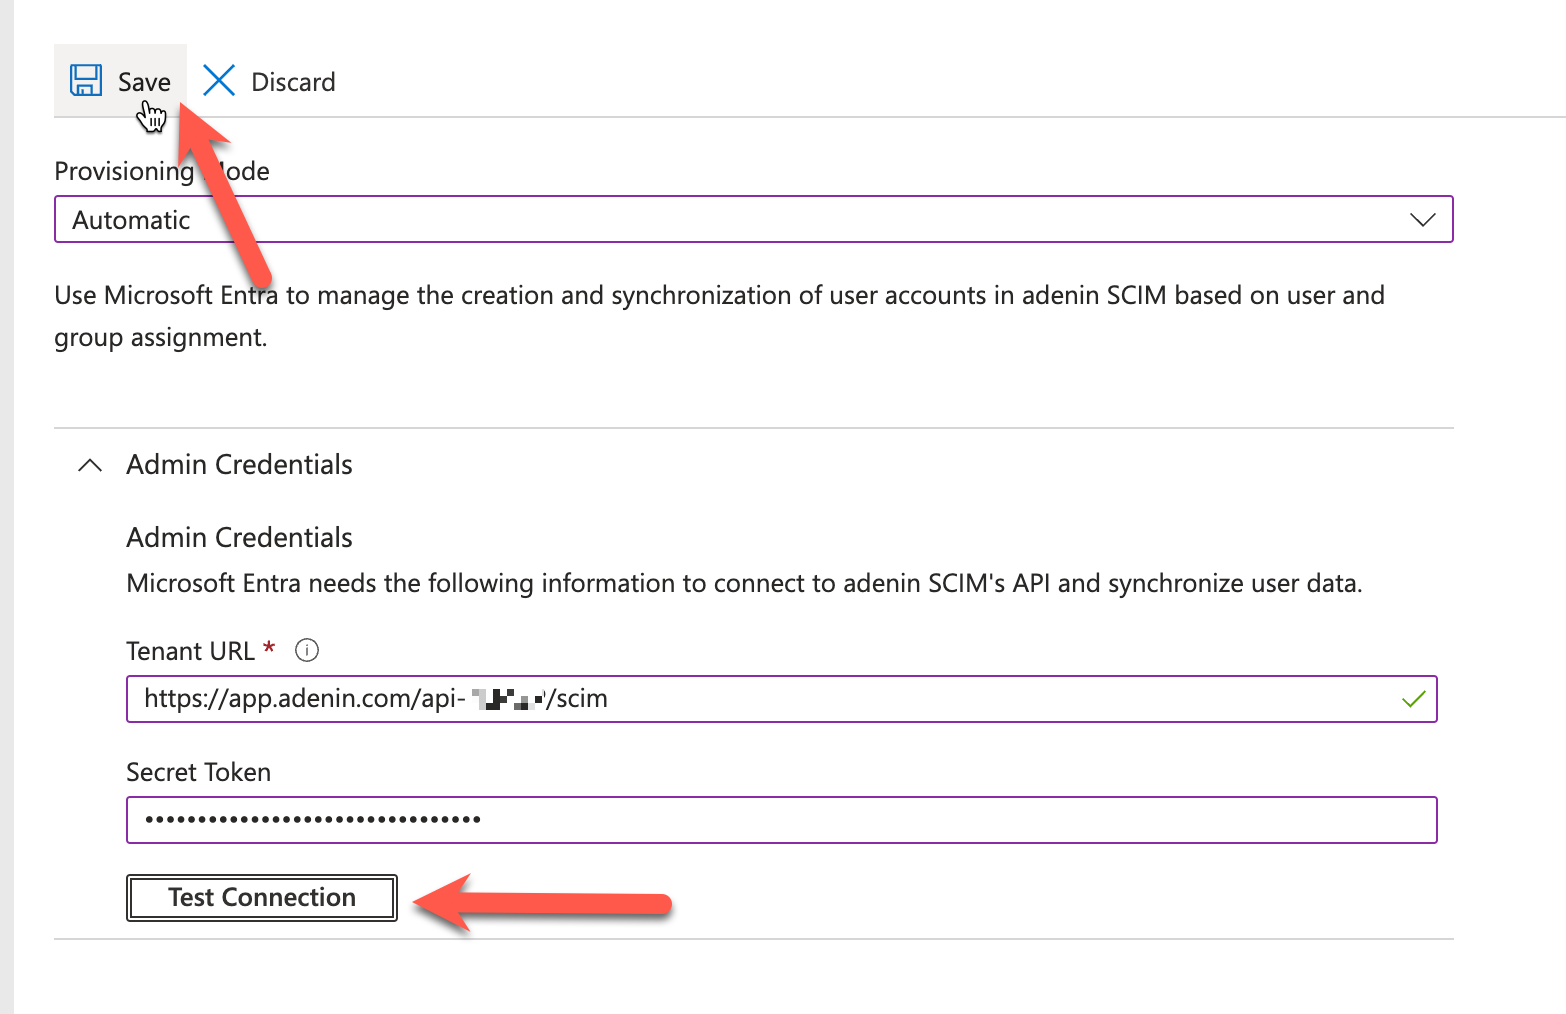
On the next screen set your Provisioning Mode to Automatic and then we're going to need to obtain the Tenant URL and Secret Token from the Adenin administration area.
Go to https://app.adenin.com and then navigate to ⚙️ → Administration → Settings → Security. At the bottom of that page we'll find the SCIM section.
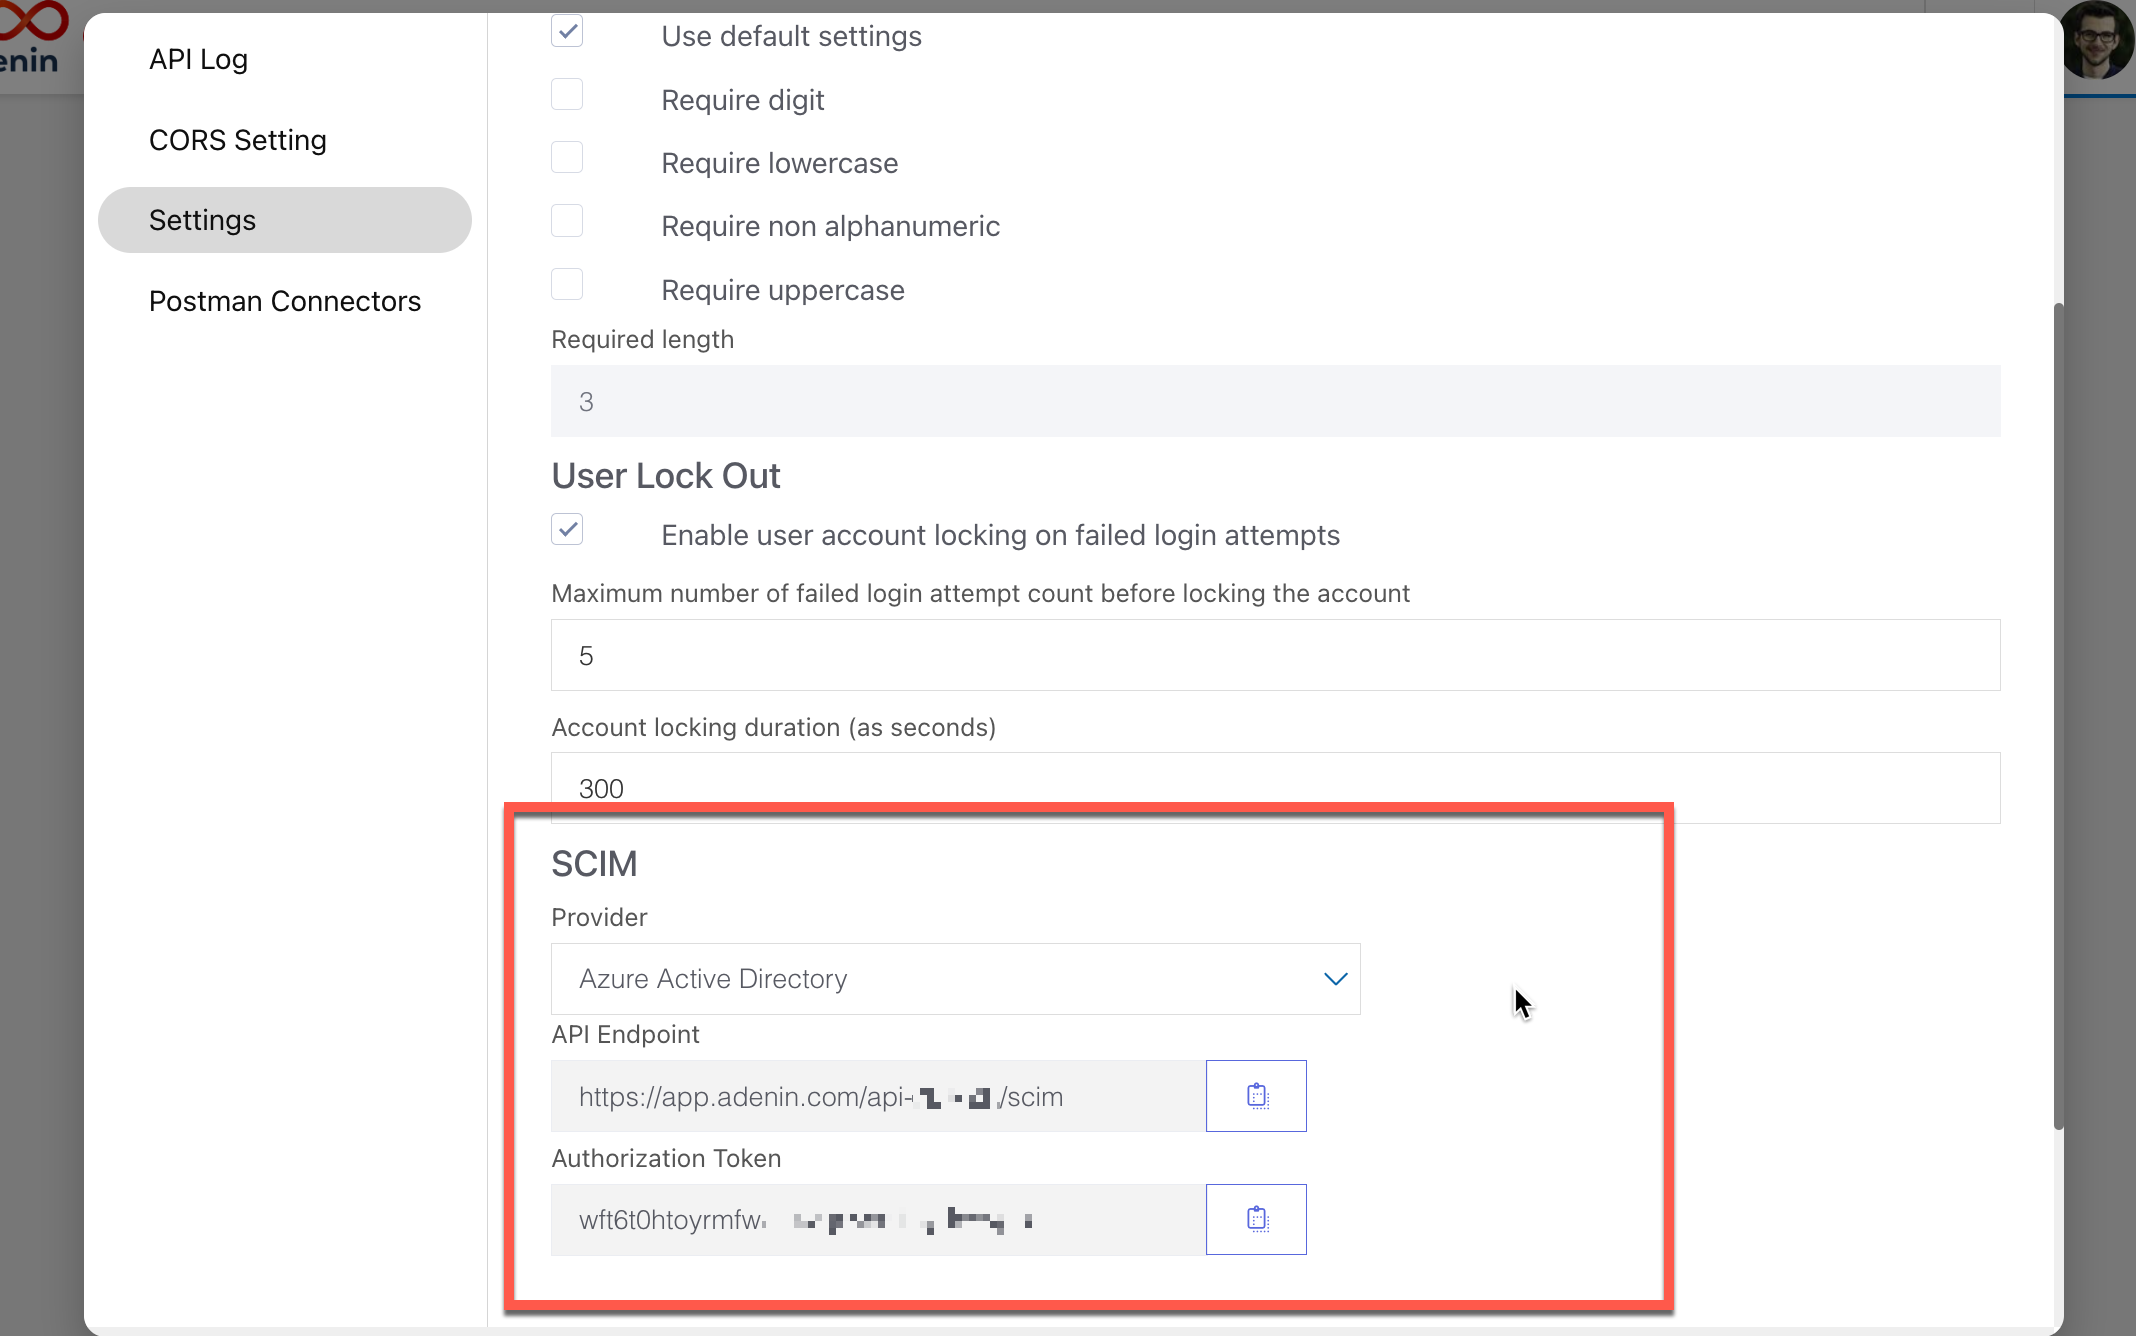
Copy the API Endpoint and Authorization Token values over to the Microsoft Entra page.
Then click on Test Connection and subsequently Save.
4. Start provisioning
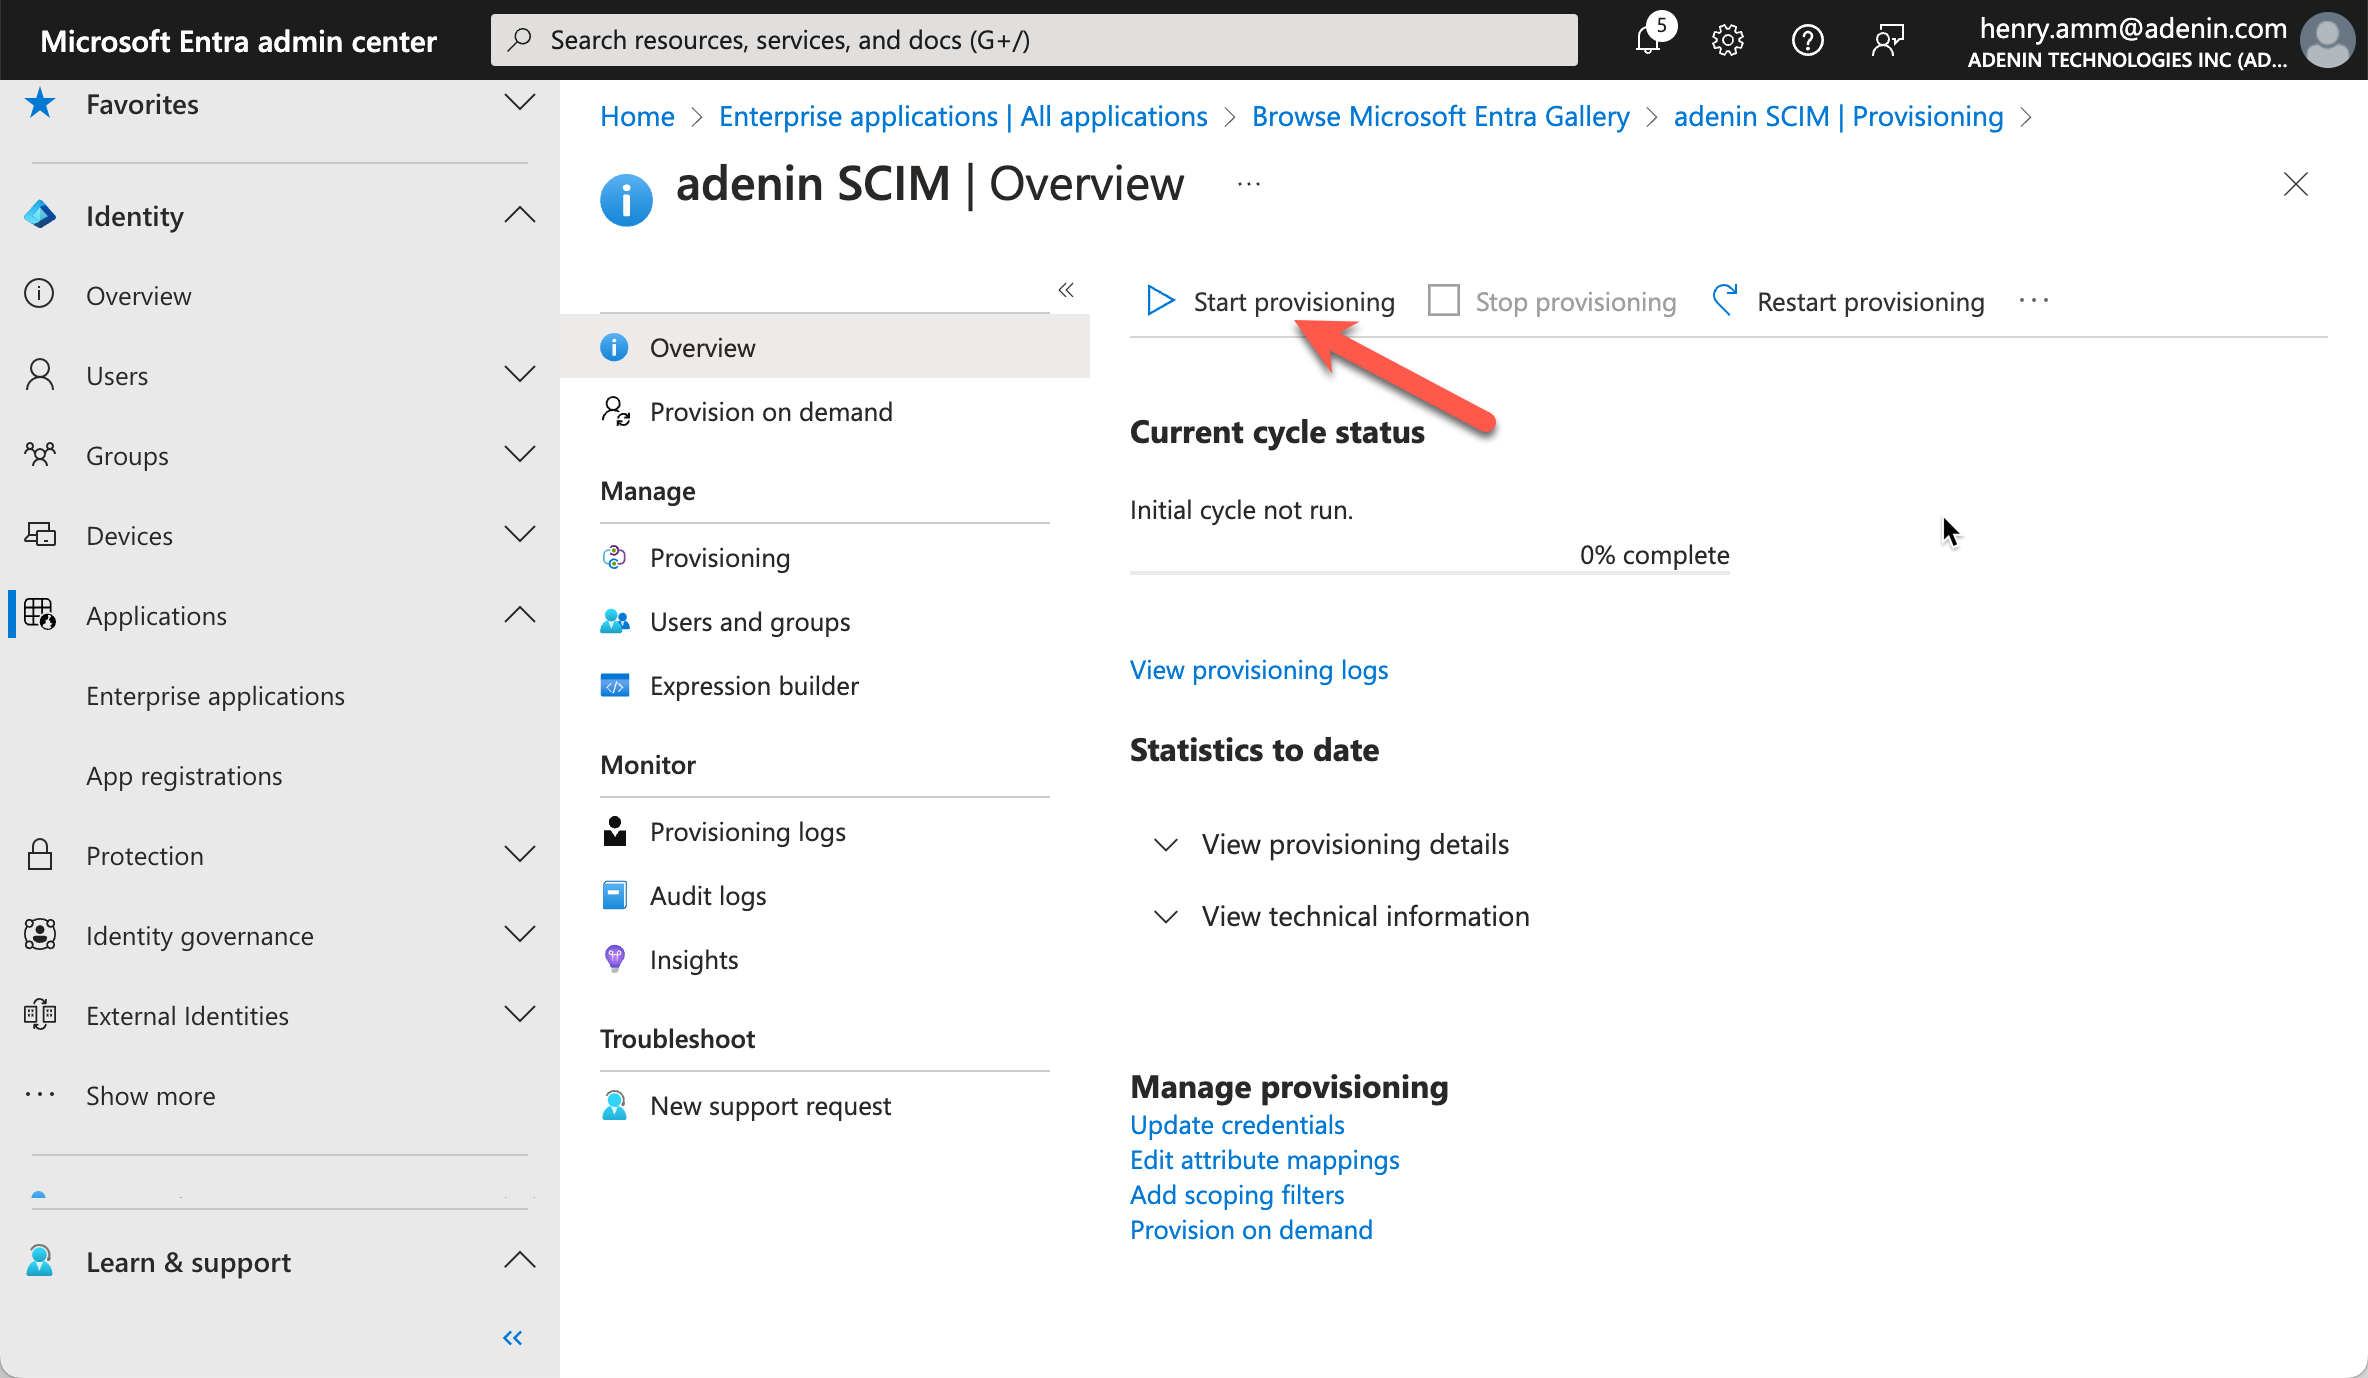
Then return back to the Provisioning overview page in your adenin SCIM page. Click on Start provisioning.
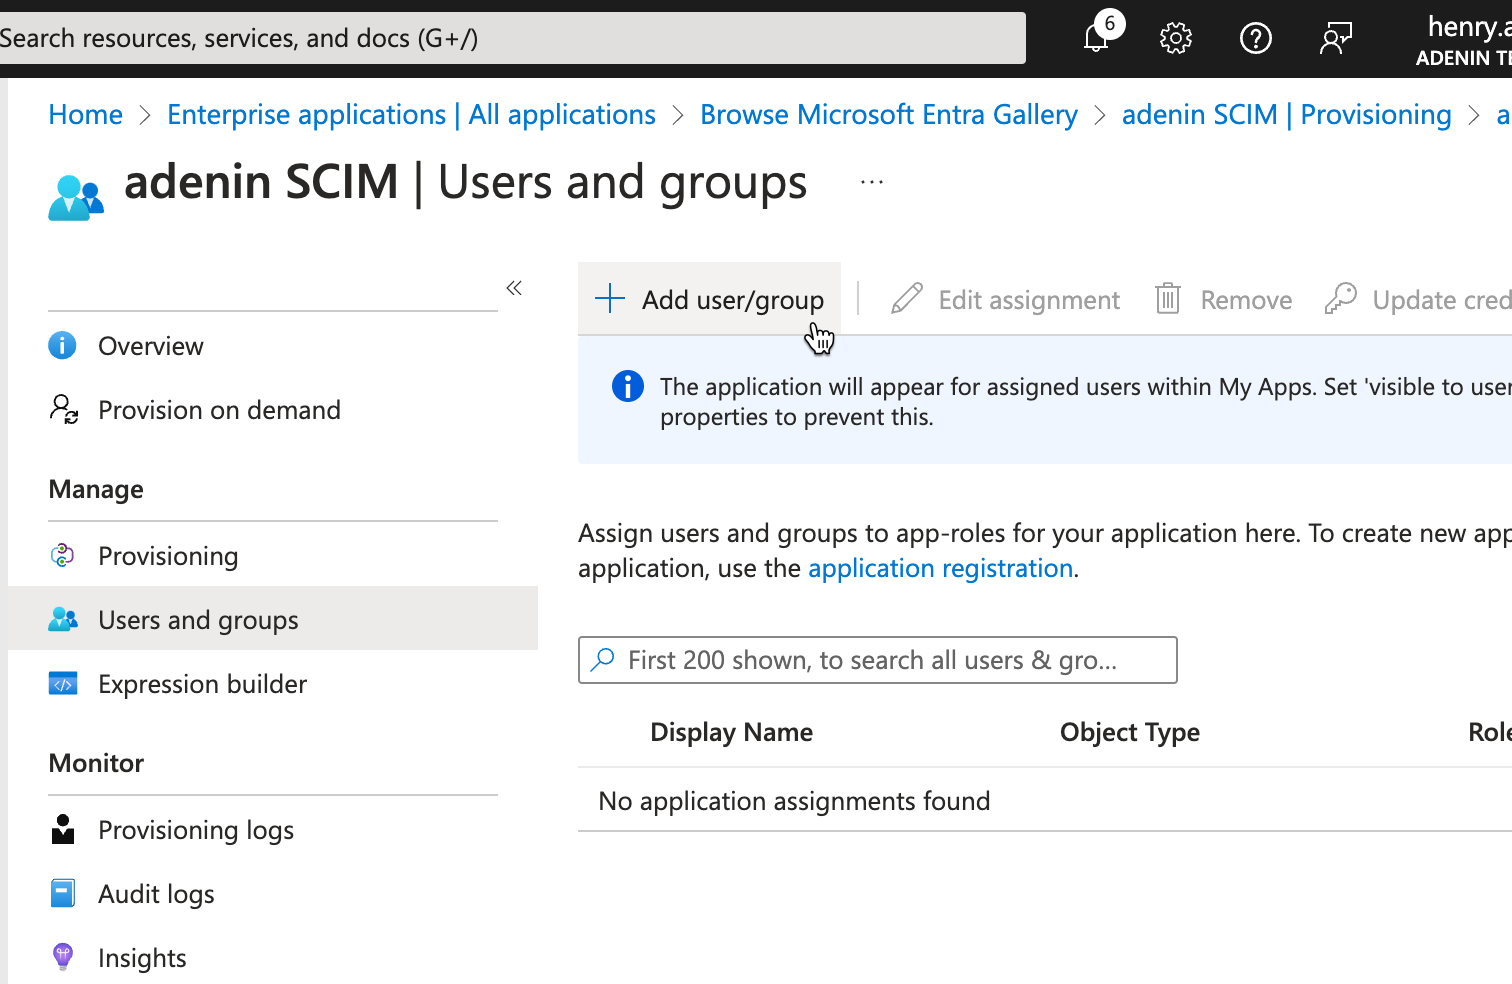
Then go to Users and groups and Add user/group.
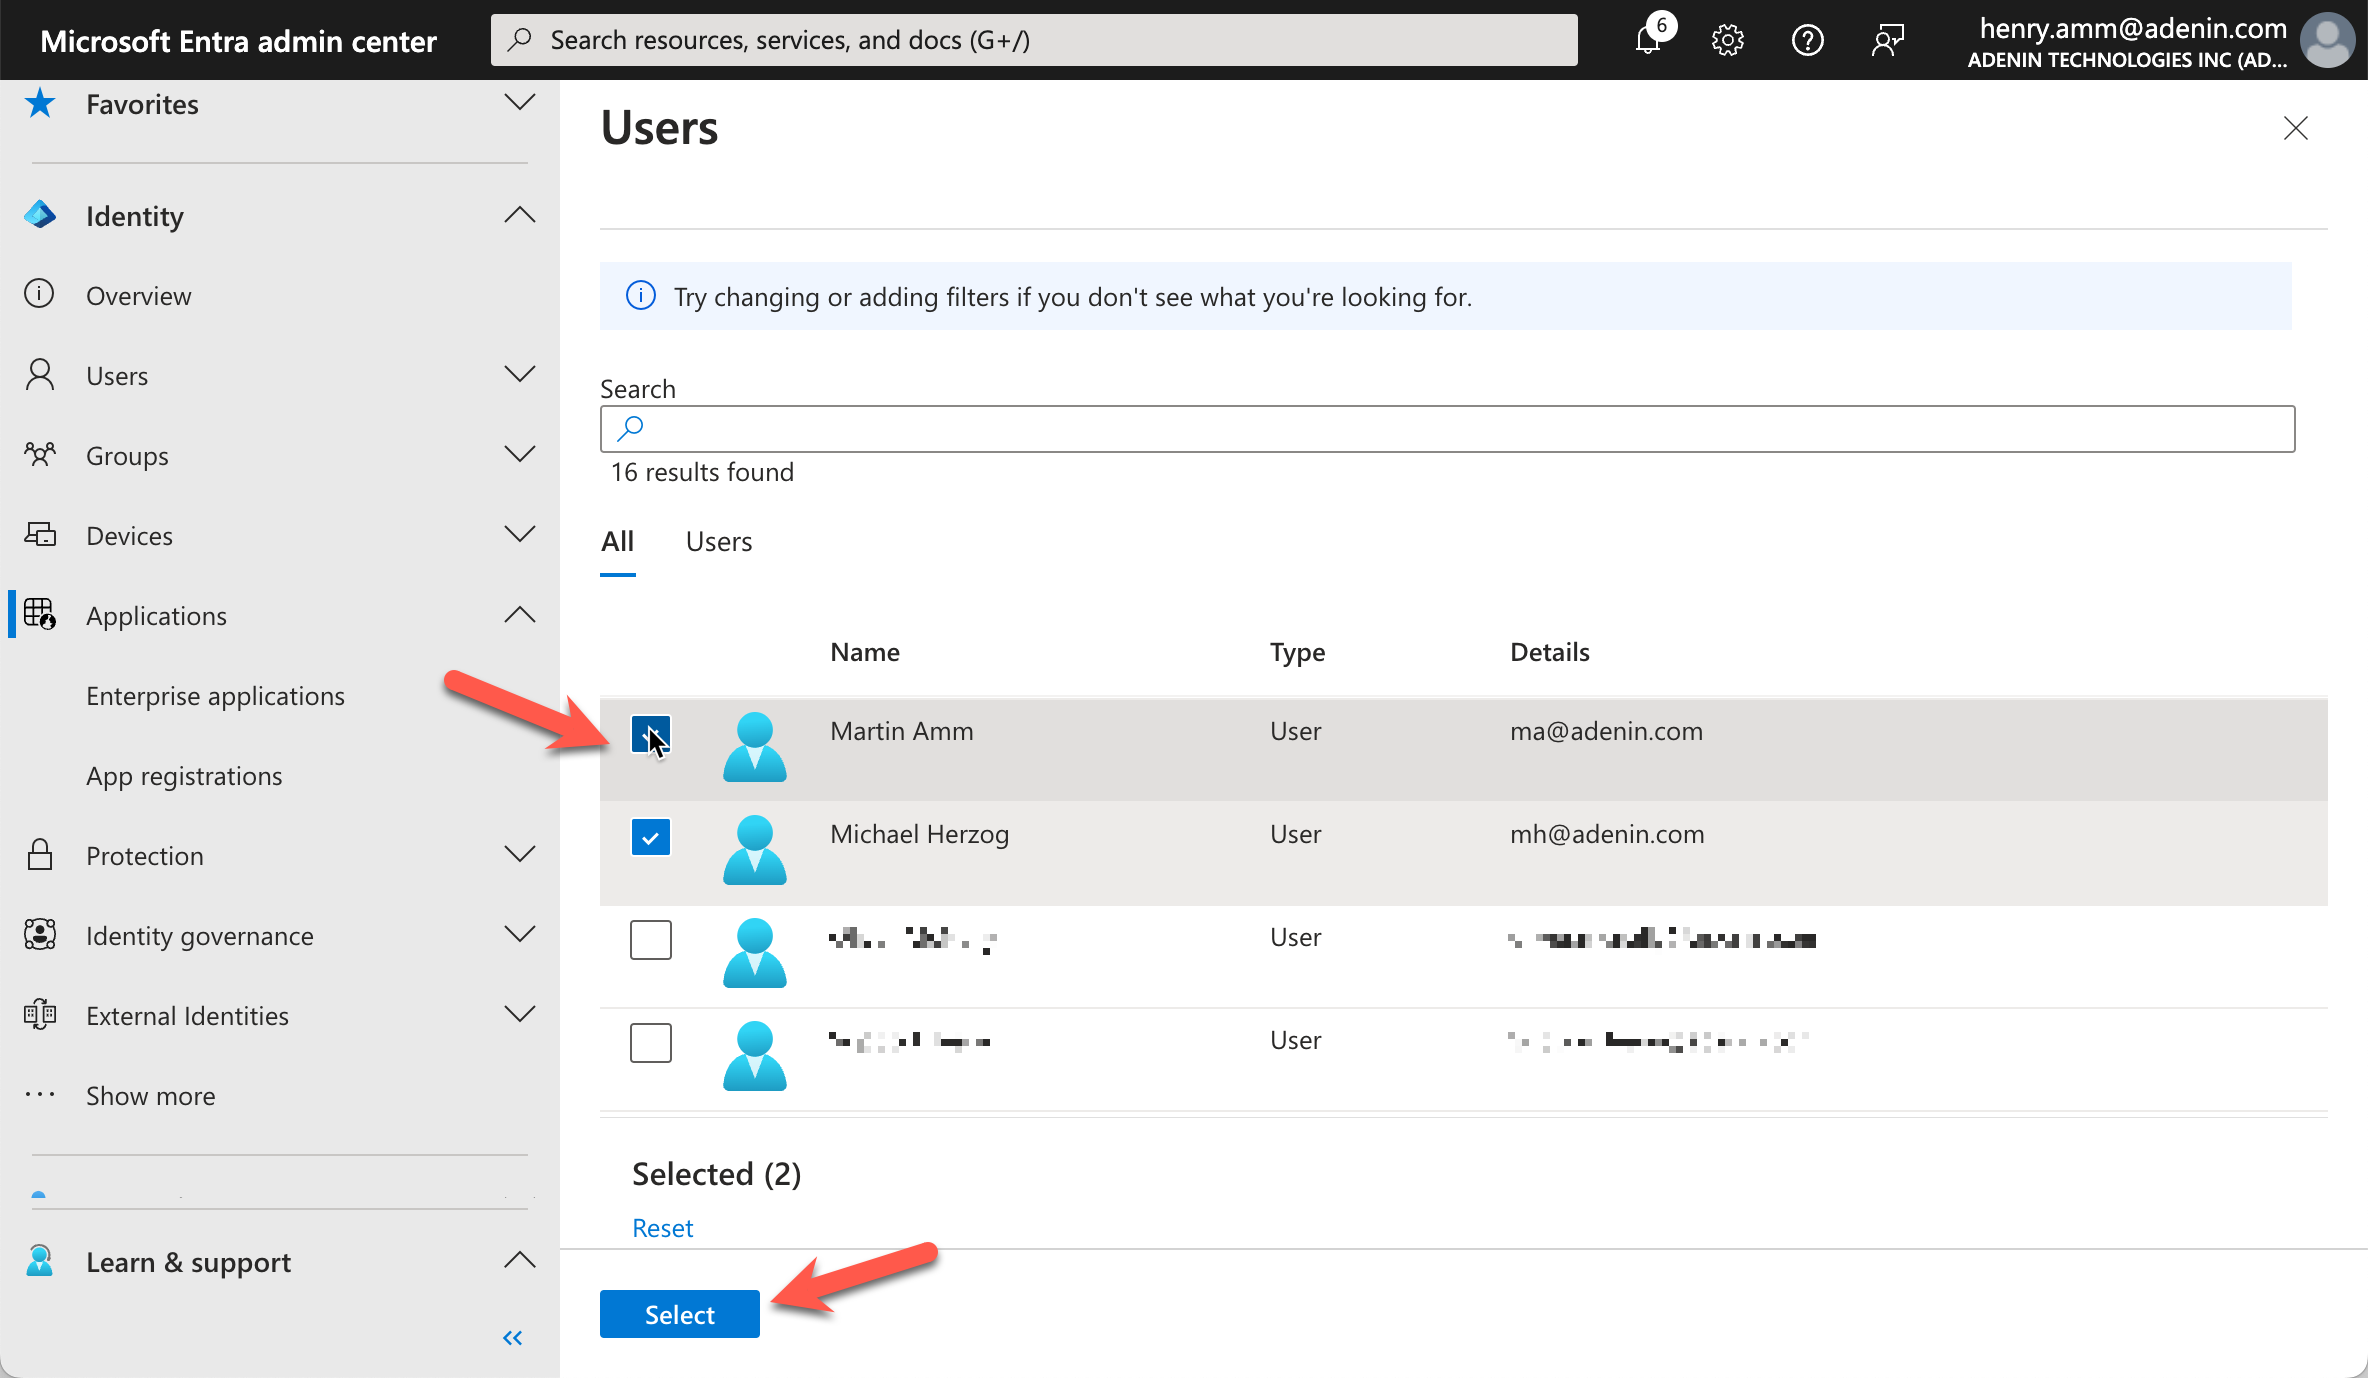
Most Entra users will need to manually select which users they want to provision. To do that click on None selected.
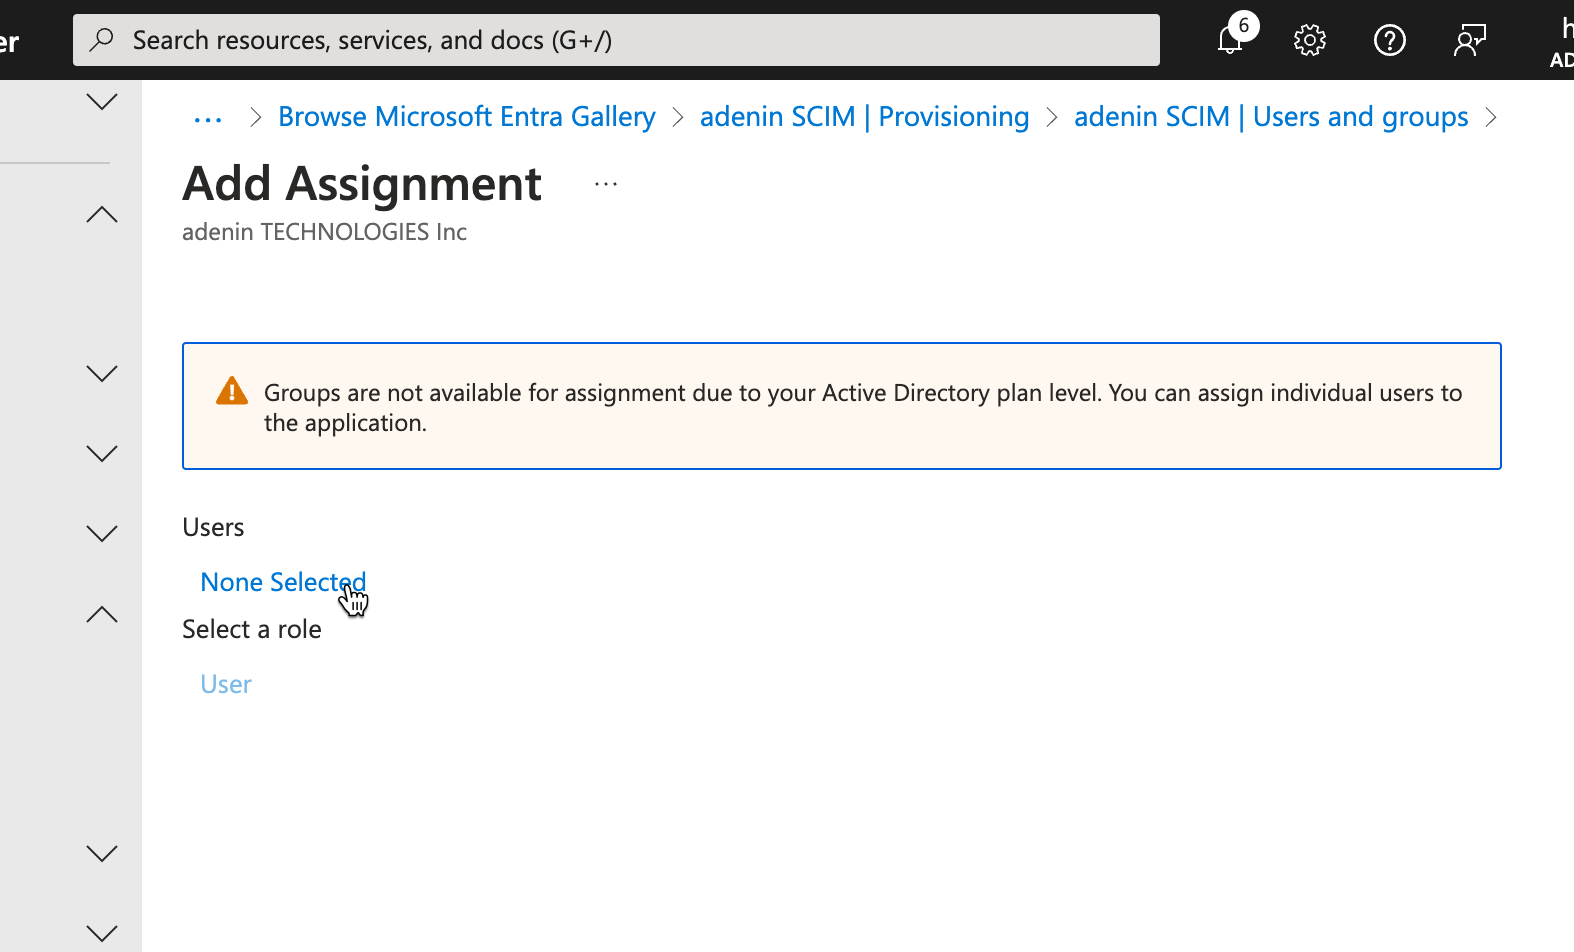
Select the users you want to sync and then click on Select.
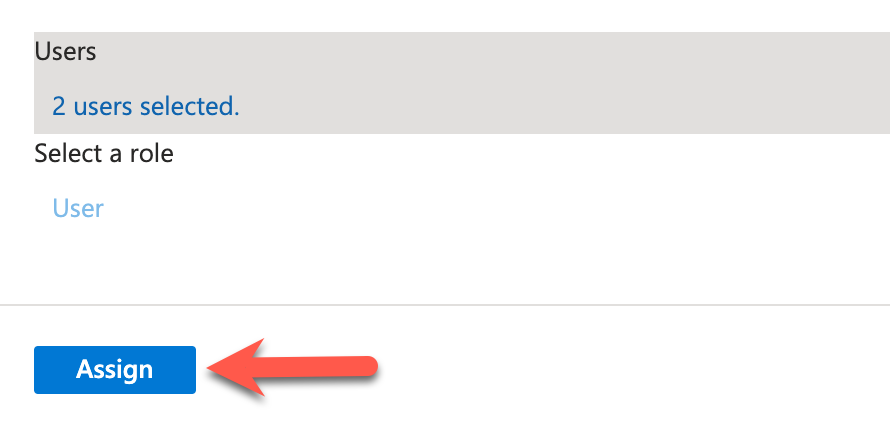
Then click on Assign.
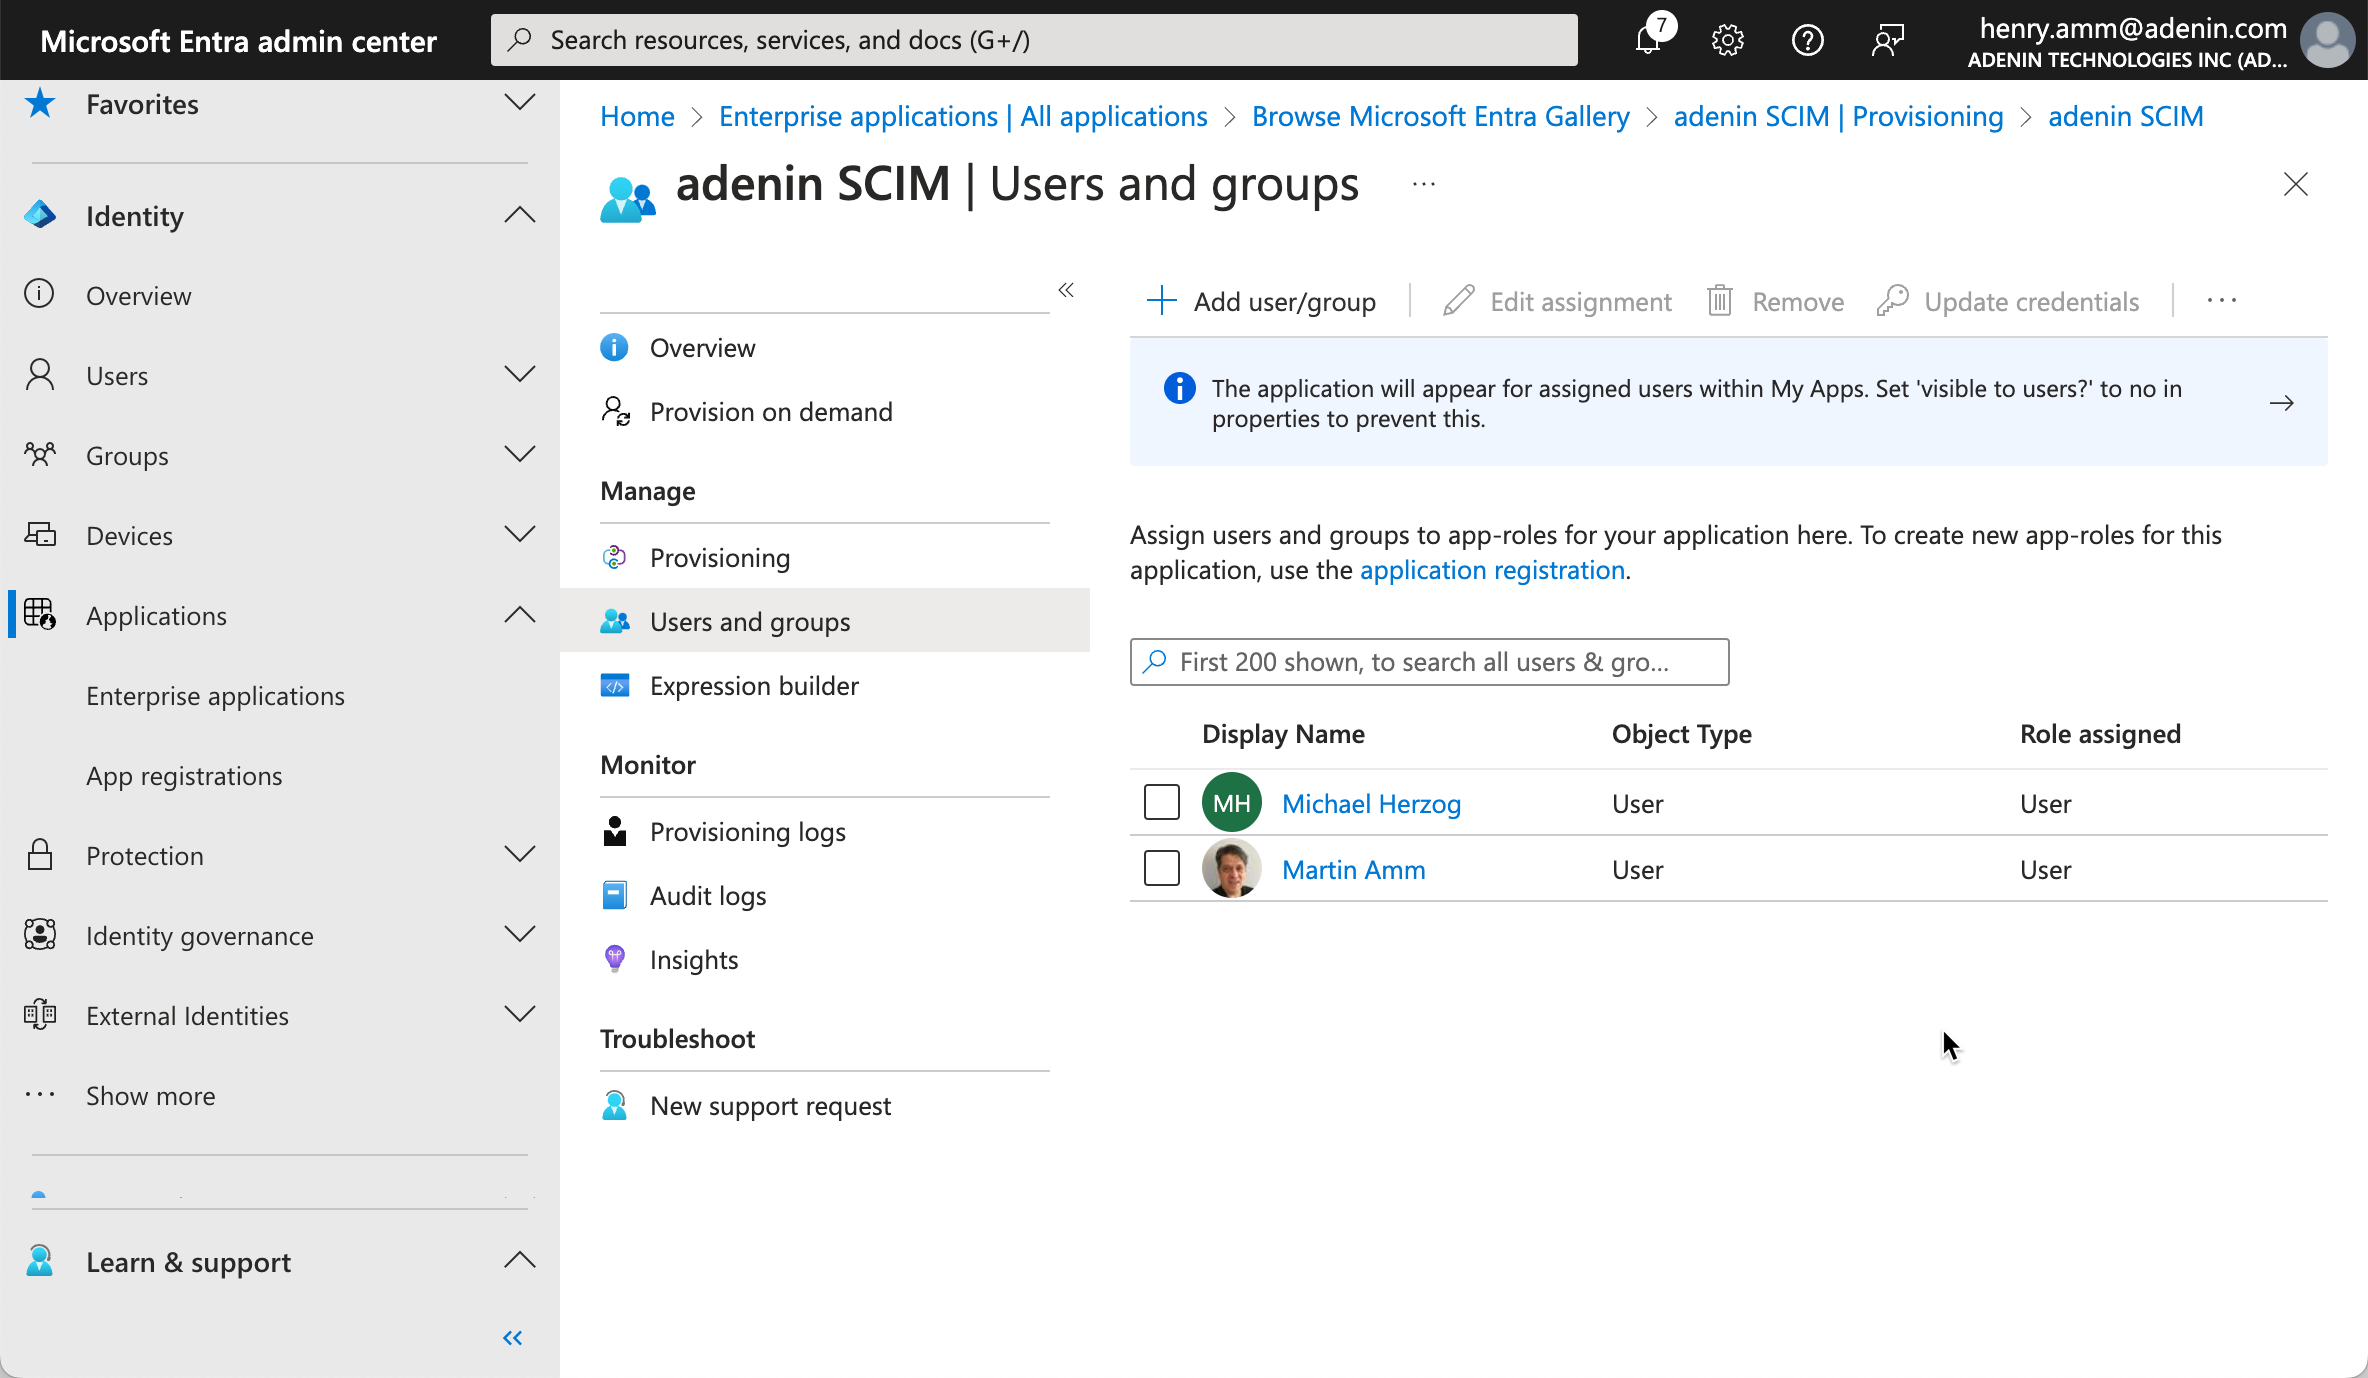
Your users will now show in the Users and groups list.
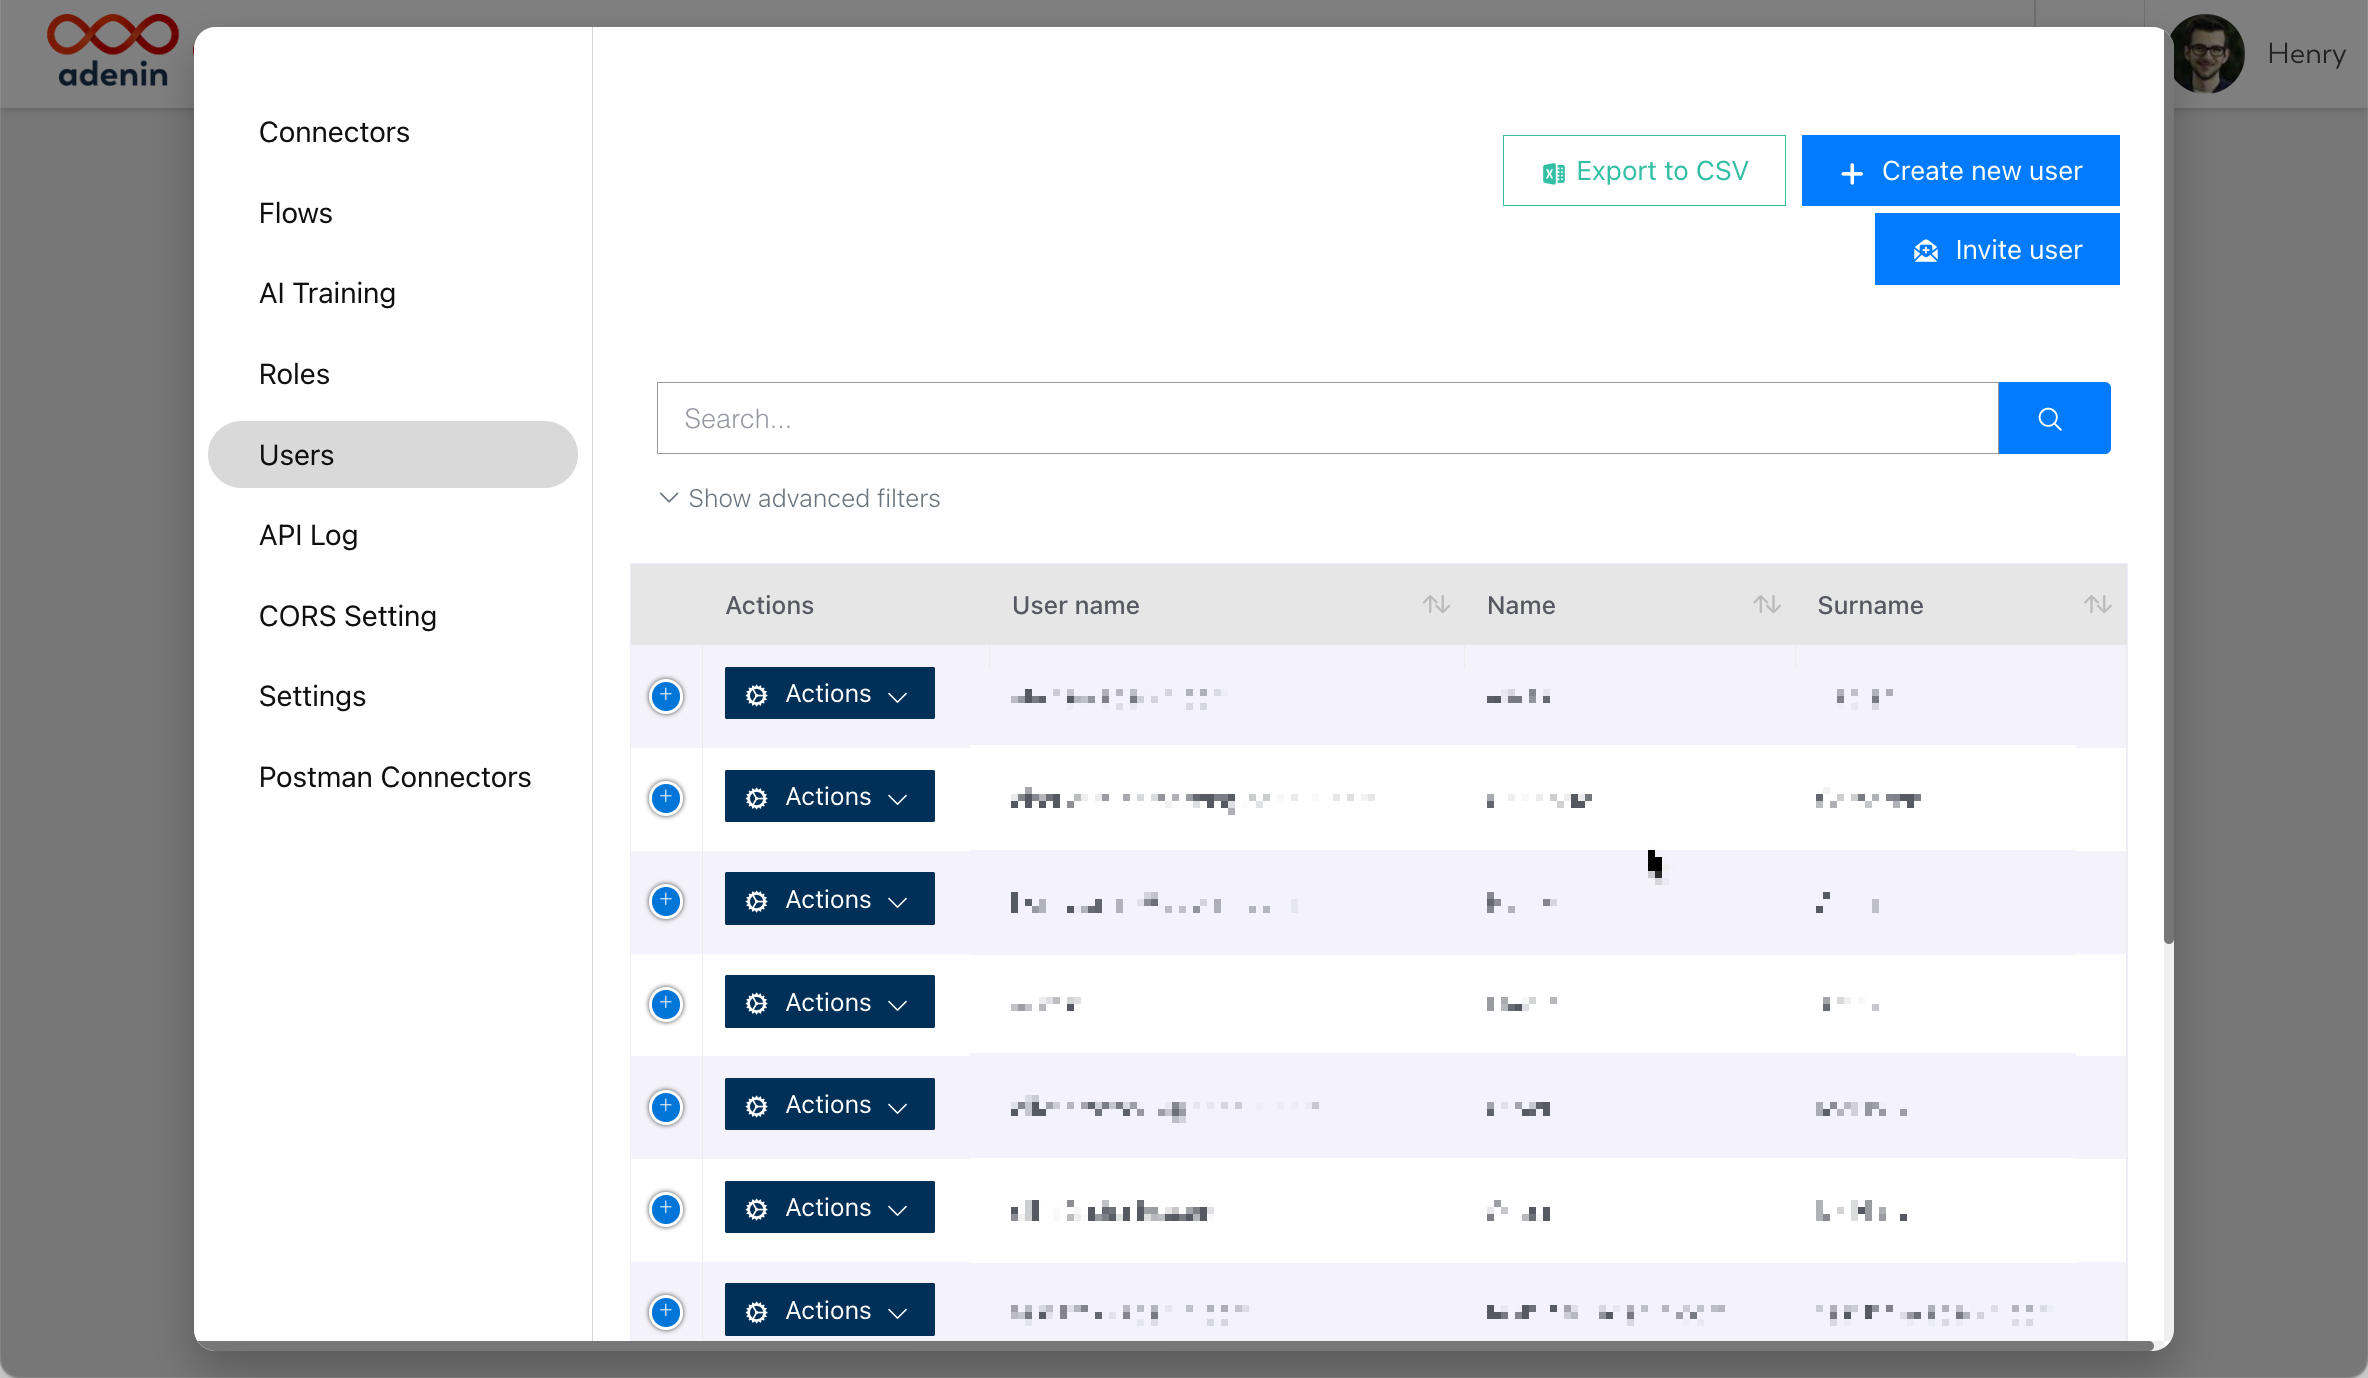
It may take up to 1 hour for the sync to occur and users to appear in Adenin's user list.
If you encounter any issues not covered in this guide, please contact our support team.